Ice Climbers (SSBU)/Up aerial: Difference between revisions
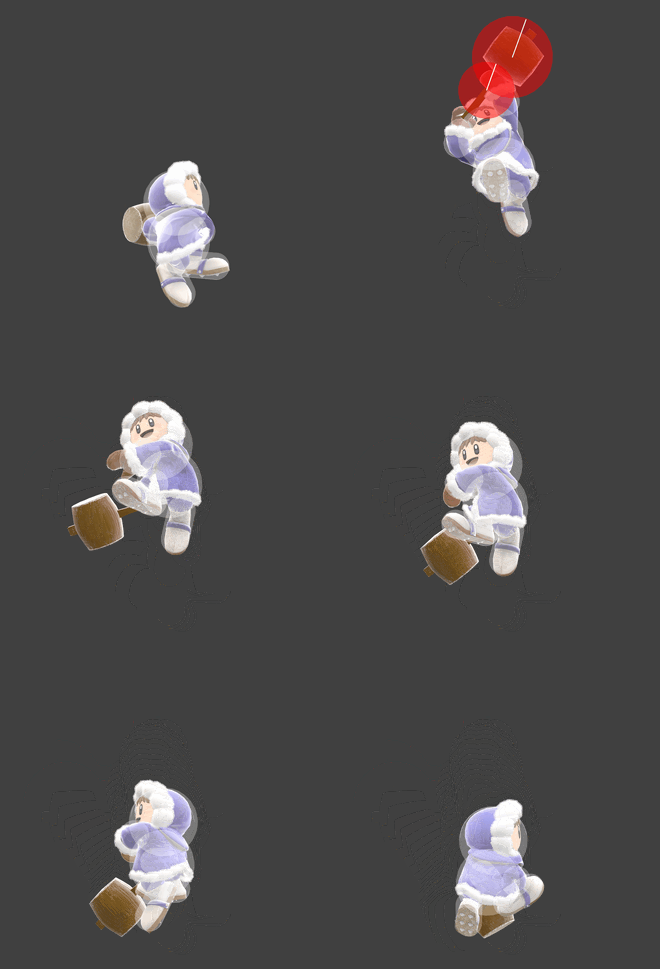
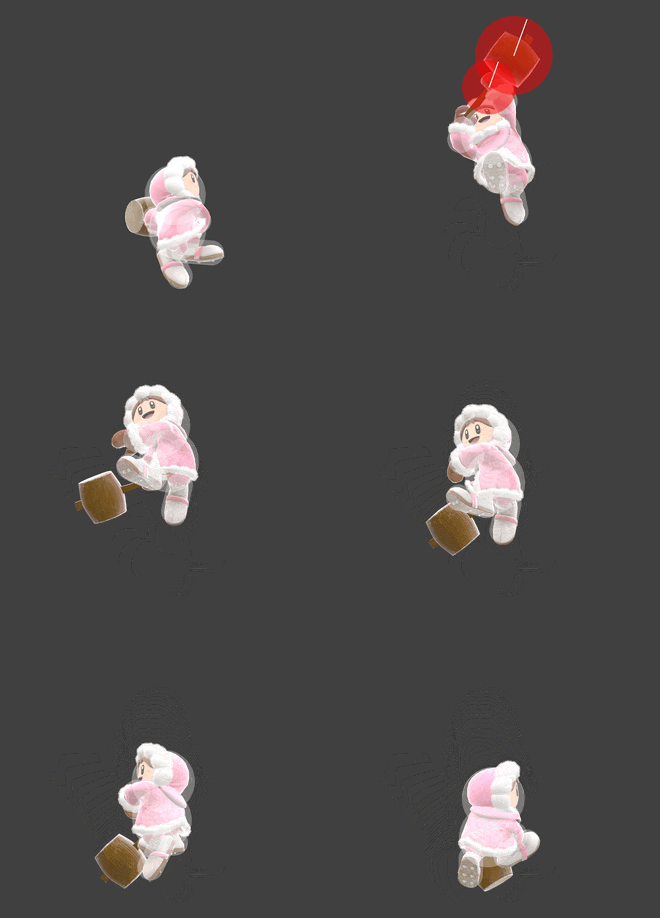
(New Page: {{ArticleIcons|ssbu=y}} thumb|440px|Hitbox visualization showing Popo's up aerial. File:NanaUAirSSBU.gif|thumb|440px|Hitbox visualization showing Nana's up a...) |
(→Trivia: New trivia) |
||
| (7 intermediate revisions by 3 users not shown) | |||
| Line 1: | Line 1: | ||
{{ArticleIcons|ssbu=y}} | {{ArticleIcons|ssbu=y}} | ||
[[File:PopoUAirSSBU.gif|thumb| | [[File:PopoUAirSSBU.gif|thumb|330px|Hitbox visualization showing Popo's up aerial.]] | ||
[[File:NanaUAirSSBU.gif|thumb| | [[File:NanaUAirSSBU.gif|thumb|330px|Hitbox visualization showing Nana's up aerial.]] | ||
==Overview== | ==Overview== | ||
Each of the duo swings their mallet outward overhead. It sports high speed, decent activity, and moderate ending and landing lag. Like many sword arc aerials, it provides quick, wide, and disjointed coverage, able to [[Juggling|juggle]] foes effectively and cover entire platforms. It deals high damage and has enough shieldstun to be nearly unpunishable out of shield, which is accentuated further yet by the climbers' landing animation keeping their hurtboxes low to the ground. | |||
The great frame advantage carried by the partner climber's part of the move allow it to chain into itself at low to mid percents, leading to highly damaging ladder combos similar to those of [[Mario (SSBU)/Up aerial|Mario]], although the much higher power of the duo's up aerial makes it less viable for kill confirms and moreso for racking up damage or as a raw kill move. Although like [[Mario (SSBU)|Mario]], a landing up aerial can lead to a [[spike]] with their [[Ice Climbers (SSBU)/Forward aerial|forward aerial]] for an early kill. Up air can also be confirmed into with a [[Ice Climbers (SSBU)/Down throw|down throw]] or [[Ice Climbers (SSBU)/Up tilt|up tilt]] at nearly any realistic percent, causing devastating damage early on and relatively easy KOs later on. However, in [[Desynching|desyncs]], it has little use save for some very niche zero to death combos. | |||
While its high launch angle prevents it from being useful for [[edgeguarding]], it's a great way to [[Sharking|shark]] unsuspecting enemies because of its speed and size. | |||
Even without a partner to strike with, the Ice Climbers' up aerial still has good range, short startup, and passable KO potential. It is therefore one of a solo climber's best moves and a solid move overall, despite losing much of its damage, safety, and combo potential upon isolation. A clear sign of what an incredible attack it is as a pair. | |||
==Hitboxes== | ==Hitboxes== | ||
{{UltimateHitboxTableHeader}} | {{UltimateHitboxTableHeader}} | ||
{{HitboxTableTitle|Leader| | {{HitboxTableTitle|Leader|50}} | ||
{{UltimateHitboxTableRow | {{UltimateHitboxTableRow | ||
|id=0 | |id=0 | ||
| Line 17: | Line 24: | ||
|bn=havel | |bn=havel | ||
|xpos=0.0 | |xpos=0.0 | ||
|ypos= | |ypos=7.0 | ||
|zpos=0.0 | |zpos=0.0 | ||
|ff=1.0 | |ff=1.0 | ||
| Line 43: | Line 50: | ||
|slvl=L | |slvl=L | ||
}} | }} | ||
{{HitboxTableTitle|Partner| | {{HitboxTableTitle|Partner|50}} | ||
{{UltimateHitboxTableRow | {{UltimateHitboxTableRow | ||
|id=0 | |id=0 | ||
| Line 49: | Line 56: | ||
|angle=70 | |angle=70 | ||
|bk=20 | |bk=20 | ||
|ks=154. | |ks=154.8 | ||
|fkv=0 | |fkv=0 | ||
|r=4.6 | |r=4.6 | ||
|bn=havel | |bn=havel | ||
|xpos=3.0 | |xpos=3.0 | ||
|ypos= | |ypos=7.0 | ||
|zpos=0.0 | |zpos=0.0 | ||
|ff=1.0 | |ff=1.0 | ||
| Line 67: | Line 74: | ||
|angle=70 | |angle=70 | ||
|bk=20 | |bk=20 | ||
|ks=154. | |ks=154.8 | ||
|fkv=0 | |fkv=0 | ||
|r=3.2 | |r=3.2 | ||
| Line 112: | Line 119: | ||
|- | |- | ||
!Animation length | !Animation length | ||
| | |22 | ||
|} | |} | ||
{{FrameStripStart}} | {{FrameStripStart}} | ||
{{FrameStrip|t=Lag|c=14}}{{FrameStrip|t=Interruptible|c= | {{FrameStrip|t=Lag|c=14}}{{FrameStrip|t=Interruptible|c=8}} | ||
{{FrameStripEnd}} | {{FrameStripEnd}} | ||
{{FrameIconLegend|lag=y|hitbox=y|autocancel=y|interruptible=y}} | {{FrameIconLegend|lag=y|hitbox=y|autocancel=y|interruptible=y}} | ||
==trivia== | |||
*If both the partner climber and their opponent are launched off stage, the partner will attempt to hit the opponent with an up aerial. | |||
*If the Ice Climbers land during an up aerial and crouch afterwards, their models will rotate 360 degrees before entering their crouching animation. | |||
{{MvSubNavIceClimbers|g=SSBU}} | {{MvSubNavIceClimbers|g=SSBU}} | ||
[[Category:Ice Climbers (SSBU)]] | [[Category:Ice Climbers (SSBU)]] | ||
[[Category:Up aerials (SSBU)]] | [[Category:Up aerials (SSBU)]] | ||
Latest revision as of 13:07, September 4, 2024
Overview[edit]
Each of the duo swings their mallet outward overhead. It sports high speed, decent activity, and moderate ending and landing lag. Like many sword arc aerials, it provides quick, wide, and disjointed coverage, able to juggle foes effectively and cover entire platforms. It deals high damage and has enough shieldstun to be nearly unpunishable out of shield, which is accentuated further yet by the climbers' landing animation keeping their hurtboxes low to the ground.
The great frame advantage carried by the partner climber's part of the move allow it to chain into itself at low to mid percents, leading to highly damaging ladder combos similar to those of Mario, although the much higher power of the duo's up aerial makes it less viable for kill confirms and moreso for racking up damage or as a raw kill move. Although like Mario, a landing up aerial can lead to a spike with their forward aerial for an early kill. Up air can also be confirmed into with a down throw or up tilt at nearly any realistic percent, causing devastating damage early on and relatively easy KOs later on. However, in desyncs, it has little use save for some very niche zero to death combos.
While its high launch angle prevents it from being useful for edgeguarding, it's a great way to shark unsuspecting enemies because of its speed and size.
Even without a partner to strike with, the Ice Climbers' up aerial still has good range, short startup, and passable KO potential. It is therefore one of a solo climber's best moves and a solid move overall, despite losing much of its damage, safety, and combo potential upon isolation. A clear sign of what an incredible attack it is as a pair.
Hitboxes[edit]
Timing[edit]
Attack[edit]
| Initial autocancel | 1-6 |
|---|---|
| Hitboxes | 7-11 |
| Ending autocancel | 27- |
| Interruptible | 36 |
| Animation length | 45 |
Landing lag[edit]
| Interruptible | 15 |
|---|---|
| Animation length | 22 |
Lag time |
Hitbox |
Autocancel |
Interruptible |
trivia[edit]
- If both the partner climber and their opponent are launched off stage, the partner will attempt to hit the opponent with an up aerial.
- If the Ice Climbers land during an up aerial and crouch afterwards, their models will rotate 360 degrees before entering their crouching animation.
|

