Debug menu (SSBM)/DEVELOP mode: Difference between revisions
Baefeather (talk | contribs) (I'll assume you meant intersect, since entercect isn't a word) Tag: Mobile edit |
(X + dpad up is a hard pause outside of matches, with the ability to frame advance too) |
||
| (9 intermediate revisions by 6 users not shown) | |||
| Line 3: | Line 3: | ||
| __TOC__ | | __TOC__ | ||
|} | |} | ||
''This article is about the usage of DEVELOP mode in Melee. For a collection of images of each stage under the effects of DEVELOP mode, see [[Debug menu (SSBM)/Stage data | ''This article is about the usage of DEVELOP mode in Melee. For a collection of images of each stage under the effects of DEVELOP mode, see [[Debug menu (SSBM)/Stage data]].'' | ||
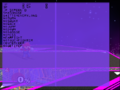
[[File:DEVELOP-Mode-SSBM.png|thumb | [[File:DEVELOP-Mode-SSBM.png|thumb|''Melee'' when run in DEVELOP mode.]] | ||
'''DEVELOP mode''' is a debug mode found in ''Super Smash Bros. Melee'' accessed through its {{SSBM|debug menu}}. The mode is activated by changing the '''DBLEVEL''' setting to ''DEVELOP''. This will give the player extra control over matches, including free camera, visual hitbox, and frame advance. | '''DEVELOP mode''' is a debug mode found in ''Super Smash Bros. Melee'' accessed through its {{SSBM|debug menu}}. The mode is activated by changing the '''DBLEVEL''' setting to ''DEVELOP''. This will give the player extra control over matches, including free camera, visual hitbox, and frame advance. | ||
Below is a table detailing the controls for the DEVELOP mode extra controls. Through these controls, one can obtain free control over the camera, see character and stage hitboxes, frame advance the match, see the parts of the stage, and drop items (similar to Training Mode). | Below is a table detailing the controls for the DEVELOP mode extra controls. Through these controls, one can obtain free control over the camera, see character and stage hitboxes, frame advance the match, see the parts of the stage, and drop items (similar to Training Mode). Using the "reset" button combination in {{SSBM|Classic Mode}}, {{SSBM|Adventure Mode}}, or [[All-Star Mode]] results in a "stage clear". | ||
{{clrl}} | {{clrl}} | ||
| Line 33: | Line 33: | ||
| {{Button|GCN|B|s=32px}} + {{Button|GCN|D-Pad|L|s=32px}} || Shows the current score and any bonuses won. | | {{Button|GCN|B|s=32px}} + {{Button|GCN|D-Pad|L|s=32px}} || Shows the current score and any bonuses won. | ||
|- | |- | ||
| {{Button|GCN|X|s=32px}} + {{Button|GCN|D-Pad|U|s=32px}} || Pauses the game normally. | | {{Button|GCN|X|s=32px}} + {{Button|GCN|D-Pad|U|s=32px}} || Pauses the game normally during a match. The button combination to quit a match is {{button|GCN|L}}+{{button|GCN|R}}+{{button|GCN|A}} instead of {{button|GCN|L}}+{{button|GCN|R}}+{{button|GCN|A}}+{{button|GCN|Start-Pause}}. | ||
"Hard pause" when in places where {{Button|GCN|Start-Pause|s=32px}} would perform an action other than pausing, such as menus, cutscenes, Adventure Mode loading screens, result screens, [[Continue]] screens, etc. Allows for frame advance with {{Button|GCN|Z|s=32px}}. | |||
|- | |- | ||
| {{Button|GCN|X|s=32px}} + {{Button|GCN|D-Pad|D|s=32px}} || Rotates through multiple visual effects. | | {{Button|GCN|X|s=32px}} + {{Button|GCN|D-Pad|D|s=32px}} || Rotates through multiple visual effects. | ||
| Line 41: | Line 43: | ||
#Stage + Background goes black. Background effects can still be seen | #Stage + Background goes black. Background effects can still be seen | ||
|- | |- | ||
| {{Button|GCN|X|s=32px}} + {{Button|GCN|D-Pad|L|s=32px}} || Toggles sound effects and music. | | {{Button|GCN|X|s=32px}} + {{Button|GCN|D-Pad|L|s=32px}} || Toggles sound effects and music. Displays additional information after going through the first four settings. | ||
#Normal | #Normal | ||
#Music off | #Music off | ||
| Line 55: | Line 57: | ||
| {{Button|GCN|Y|s=32px}} + {{Button|GCN|D-Pad|R|s=32px}} || Sets the player back to normal size. | | {{Button|GCN|Y|s=32px}} + {{Button|GCN|D-Pad|R|s=32px}} || Sets the player back to normal size. | ||
|- | |- | ||
| {{Button|GCN|R|s=32px}} + {{Button|GCN|D-Pad|U|s=32px}} || Toggles collision bubbles for all characters and stage elements (See [[#Collision | | {{Button|GCN|R|s=32px}} + {{Button|GCN|D-Pad|U|s=32px}} || Toggles collision bubbles for all characters and stage elements (See [[#Collision bubble key]]). | ||
#Normal | #Normal | ||
#Collision Bubbles Only | #Collision Bubbles Only | ||
#Collision Overlay | #Collision Overlay | ||
|- | |- | ||
| {{Button|GCN|R|s=32px}} + {{Button|GCN|D-Pad|D|s=32px}} || Toggles various stage related visuals, such as spawn points, stage structures, and grab-able ledges (See [[#Stage | | {{Button|GCN|R|s=32px}} + {{Button|GCN|D-Pad|D|s=32px}} || Toggles various stage related visuals, such as spawn points, stage structures, and grab-able ledges (See [[#Stage visual key]]). | ||
#Normal | #Normal | ||
#Removes shadows | #Removes shadows | ||
# | #Displays camera boxes, spawn points, and changes certain floor surfaces to black. | ||
# | #Same as above, but without the black floor change. | ||
# | #Same as above, but also displays colored Stage Structures, ledge grab boxes, environment collision boxes, and character position markers (See [[#Character visual key]]). | ||
# | #Same as above, but displays [[Terrain]]s instead of colored Stage Structures. | ||
# | #Same as above, but also displays indication of drop-through platforms and grab-able ledges. | ||
|- | |- | ||
| {{Button|GCN|R|s=32px}} + {{Button|GCN|D-Pad|L|s=32px}} || Places white boxes around the characters. These boxes turn blue when in the air. | | {{Button|GCN|R|s=32px}} + {{Button|GCN|D-Pad|L|s=32px}} || Toggles various character related visuals | ||
Also displays pink boxes around items. When the white/or blue box intersects a pink box | #Normal | ||
#Displays white polylines used for character costume physics like Link's and Young Link's hats, Marth's cape, and some of Jigglypuffs headwear. | |||
#Displays a red gradient at the characters position marker as wide as the characters ECB indicating vertical motion since the last frame. | |||
#Visualizes CPU logic. Places a sphere at the computer player's point of interest, green indicates the CPU will approach, red indicates the CPU will attack it, white indicates the CPU will recover towards it. Red squares around the CPU indicate the range of the attack chosen. | |||
#Places white item grab boxes around the characters. These boxes turn blue when in the air. Also displays pink item catch boxes around items. When the white/or blue box intersects a pink box, the item can be grabbed. When white an item will continue to travel after pressing "A" to grab it, for 1 frame. When they are blue and Z is pressed to grab the item, the item will be instantly picked up (And instantly throwable). Also shows a smaller gray item lift box (grounded only), used for larger items like barrels, party balls, and crates. | |||
#Displays a white sphere attached to the characters pelvis that experiences frame interpolation similar to hitboxes. | |||
#Displays each player's coin detection spheres and displays a hitbox sphere on each coin. Player coin detection hitbox flicker because only half the players' coin collisions are processed each frame in order to save on resources. | |||
|- | |- | ||
| {{Button|GCN|R|s=32px}} + {{Button|GCN|D-Pad|R|s=32px}} || Toggles collision bubbles for the player (See [[#Collision | | {{Button|GCN|R|s=32px}} + {{Button|GCN|D-Pad|R|s=32px}} || Toggles collision bubbles for the player (See [[#Collision bubble key]]). | ||
#Normal | #Normal | ||
#Collision Bubbles Only | #Collision Bubbles Only | ||
| Line 80: | Line 87: | ||
| {{Button|GCN|D-Pad|D|s=32px}} || Drops item selected on the Item Menu | | {{Button|GCN|D-Pad|D|s=32px}} || Drops item selected on the Item Menu | ||
|- | |- | ||
| {{Button|GCN|L|s=32px}} + {{Button|GCN|D-Pad|U|s=32px}} || Display Item Menu and cycle forward through the list (See [[ | | {{Button|GCN|L|s=32px}} + {{Button|GCN|D-Pad|U|s=32px}} || Display Item Menu and cycle forward through the list (See [[Debug menu (SSBM)#Items & Pokémon]]). | ||
|- | |- | ||
| {{Button|GCN|L|s=32px}} + {{Button|GCN|D-Pad|D|s=32px}} || Display Item Menu and cycle backward through the list (See [[ | | {{Button|GCN|L|s=32px}} + {{Button|GCN|D-Pad|D|s=32px}} || Display Item Menu and cycle backward through the list (See [[Debug menu (SSBM)#Items & Pokémon]]). | ||
|- | |- | ||
| {{Button|GCN|L|s=32px}} + {{Button|GCN|D-Pad|L|s=32px}} || Display Item Menu and cycle forward through Pokémon on the list (See [[ | | {{Button|GCN|L|s=32px}} + {{Button|GCN|D-Pad|L|s=32px}} || Display Item Menu and cycle forward through Pokémon on the list (See [[Debug menu (SSBM)#Items & Pokémon]]). | ||
|- | |- | ||
| {{Button|GCN|L|s=32px}} + {{Button|GCN|D-Pad|R|s=32px}} || Display Item Menu and cycle backward through Pokémon on the list (See [[ | | {{Button|GCN|L|s=32px}} + {{Button|GCN|D-Pad|R|s=32px}} || Display Item Menu and cycle backward through Pokémon on the list (See [[Debug menu (SSBM)#Items & Pokémon]]). | ||
|- | |- | ||
| {{Button|GCN|D-Pad|U|s=32px}} || Changes the camera view. | | {{Button|GCN|D-Pad|U|s=32px}} || Changes the camera view. | ||
| Line 103: | Line 110: | ||
|} | |} | ||
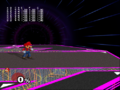
==Stage | ==Stage visual key== | ||
''For a collection of stages in their various debug states, see [[Debug menu (SSBM)/ | ''For a collection of stages in their various debug states, see [[Debug menu (SSBM)/Stage data]].'' | ||
===Camera | ===Camera boxes=== | ||
{| class="wikitable" | {| class="wikitable" | ||
|- | |- | ||
| Line 122: | Line 129: | ||
|} | |} | ||
===Spawn | ===Spawn points=== | ||
{| class="wikitable" | {| class="wikitable" | ||
|- | |- | ||
! Item !! Description | ! Item !! Description | ||
|- | |- | ||
| style="background-color:#7D7DFF"|Blue Plus || Character | | style="background-color:#7D7DFF"|Blue Plus || Character starting point | ||
|- | |- | ||
| style="background-color:#7DFF80"|Green Plus || Character | | style="background-color:#7DFF80"|Green Plus || Character respawn point | ||
|- | |- | ||
| style="background-color:#FFFF80"|Yellow Plus || Item | | style="background-color:#FFFF80"|Yellow Plus || Item spawn point | ||
|- | |- | ||
| style="background-color:#FF4040"|Red Plus || Enemy | | style="background-color:#FF4040"|Red Plus || Enemy spawn point | ||
|- | |- | ||
| style="background-color:#FF40C0"|Magenta Plus || Trophy | | style="background-color:#FF40C0"|Magenta Plus || Trophy spawn point | ||
|- | |- | ||
| style="background-color:#FFFFFF"|White Plus || Exit | | style="background-color:#FFFFFF"|White Plus || Exit point | ||
|} | |} | ||
| Line 145: | Line 152: | ||
! Item !! Description | ! Item !! Description | ||
|- | |- | ||
| style="background-color:#C0C0C0"|Gray Structure || Stage | | style="background-color:#C0C0C0"|Gray Structure || Stage floor | ||
|- | |- | ||
| style="background-color:#C08080"|Red Structure || Stage | | style="background-color:#C08080"|Red Structure || Stage ceiling | ||
|- | |- | ||
| style="background-color:#8080C0"|Blue Structure || Stage | | style="background-color:#8080C0"|Blue Structure || Stage left wall | ||
|- | |- | ||
| style="background-color:#80C080"|Green Structure || Stage | | style="background-color:#80C080"|Green Structure || Stage right wall | ||
|- | |- | ||
| style="background-color:#808080"|Gray Platform || Solid | | style="background-color:#808080"|Gray Platform || Solid no-grab platform | ||
|- | |- | ||
| style="background-color:#4040FF"|Blue Platform || Drop- | | style="background-color:#4040FF"|Blue Platform || Drop-through platform | ||
|- | |- | ||
| style="background-color:#FF4040"|Red Platform || Grab | | style="background-color:#FF4040"|Red Platform || Grab platform | ||
|} | |} | ||
Structures that appear darker than other structures are dynamic, meaning they convert between floor, wall, and ceiling in real-time as they animate. One example is the entirety of Brinstar Depths. | Structures that appear darker than other structures are dynamic, meaning they convert between floor, wall, and ceiling in real-time as they animate. One example is the entirety of Brinstar Depths. | ||
| Line 166: | Line 173: | ||
! Item !! Description | ! Item !! Description | ||
|- | |- | ||
| style="background-color:#808080"|Gray Platform || Basic | | style="background-color:#808080"|Gray Platform || Basic terrain | ||
|- | |- | ||
| style="background-color:#806060"|Brown Platform || Rock | | style="background-color:#806060"|Brown Platform || Rock terrain | ||
|- | |- | ||
| style="background-color:#40FF40"|Light Green Platform || Grass | | style="background-color:#40FF40"|Light Green Platform || Grass terrain | ||
|- | |- | ||
| style="background-color:#C06060"|Dark Red Platform || Dirt | | style="background-color:#C06060"|Dark Red Platform || Dirt terrain | ||
|- | |- | ||
| style="background-color:#C08040"|Light Brown Platform || Wood | | style="background-color:#C08040"|Light Brown Platform || Wood terrain | ||
|- | |- | ||
| style="background-color:#4040FF"|Blue Platform || Water | | style="background-color:#4040FF"|Blue Platform || Water terrain | ||
|- | |- | ||
| style="background-color:#C0C0FF"|Light Blue Platform || Ice | | style="background-color:#C0C0FF"|Light Blue Platform || Ice terrain | ||
|- | |- | ||
| style="background-color:#FFFFFF"|White Platform || Snow | | style="background-color:#FFFFFF"|White Platform || Snow terrain | ||
|- | |- | ||
| style="background-color:#404040"|Dark Gray Platform || Light Metal | | style="background-color:#404040"|Dark Gray Platform || Light Metal terrain | ||
|- | |- | ||
| style="background-color:#604040"|Dark Brown Platform || Heavy Metal | | style="background-color:#604040"|Dark Brown Platform || Heavy Metal terrain | ||
|- | |- | ||
| style="background-color:#FFFF60"|Yellow Platform || Alien Goop | | style="background-color:#FFFF60"|Yellow Platform || Alien Goop terrain | ||
|- | |- | ||
| style="background-color:#C0C0C0"|Light Gray Platform || Game & Watch | | style="background-color:#C0C0C0"|Light Gray Platform || Game & Watch terrain | ||
|- | |- | ||
| style="background-color:#FFFFC0"|Light Yellow Platform || Checkered | | style="background-color:#FFFFC0"|Light Yellow Platform || Checkered terrain | ||
|} | |} | ||
| Line 201: | Line 208: | ||
|} | |} | ||
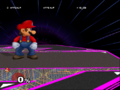
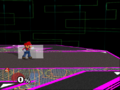
==Collision | ==Collision bubble key== | ||
[[File:Hitbox-DBMelee.png|thumb|300px|Luigi demonstrating visual hitboxes.]] | [[File:Hitbox-DBMelee.png|thumb|300px|Luigi demonstrating visual hitboxes.]] | ||
This is a list of all hitbox colors and what they are for. For more detail, see [[Hitbox# | This is a list of all hitbox colors and what they are for. For more detail, see [[Hitbox#Hitbox types]]. | ||
{| class="wikitable" | {| class="wikitable" | ||
|- | |- | ||
| Line 225: | Line 232: | ||
|- | |- | ||
| style="background-color:#FFFFFF"|White || Special | | style="background-color:#FFFFFF"|White || Special | ||
|} | |||
==Character visual key== | |||
===Environment collision boxes (ECB)=== | |||
{| class="wikitable" | |||
|- | |||
! Item !! Description | |||
|- | |||
| style="background-color:#FFFFFF"|White Diamond Outline|| Target ECB position. | |||
|- | |||
| style="background-color:#FFA030"|Orange Diamond || Post-collisions ECB, the target ECB altered to avoid intersecting with stage structures. | |||
|- | |||
| style="background-color:#ff5a20"|Dark Orange Diamond || Pre-collision ECB at most recent collision segment. | |||
|- | |||
| style="color:#FFFFFF;background-color:#2020FF"|Blue Diamond || Pre-collisions ECB. | |||
|} | |||
===Character position markers=== | |||
{| class="wikitable" | |||
|- | |||
! Item !! Description | |||
|- | |||
| style="background-color:#FFFFFF"|White Cross|| Target Character Position. | |||
|- | |||
| style="color:#FFFFFF;background-color:#805019"|Brown Cross || Post-collisions character position. | |||
|- | |||
| style="color:#FFFFFF;background-color:#802D10"|Reddish Brown Cross || Pre-collision character position at most recent collision segment. | |||
|- | |||
| style="color:#FFFFFF;background-color:#2020FF"|Dark Blue Cross || Pre-collisions character position. | |||
|} | |} | ||
| Line 241: | Line 278: | ||
</gallery> | </gallery> | ||
{{Debug menu (SSBM) | {{Debug menu (SSBM)}} | ||
[[Category: Debug menu (SSBM)]] | [[Category:Debug menu (SSBM)]] | ||
[[Category: Hacking]] | [[Category:Hacking]] | ||
Latest revision as of 17:54, July 19, 2024
This article is about the usage of DEVELOP mode in Melee. For a collection of images of each stage under the effects of DEVELOP mode, see Debug menu (SSBM)/Stage data.

DEVELOP mode is a debug mode found in Super Smash Bros. Melee accessed through its debug menu. The mode is activated by changing the DBLEVEL setting to DEVELOP. This will give the player extra control over matches, including free camera, visual hitbox, and frame advance.
Below is a table detailing the controls for the DEVELOP mode extra controls. Through these controls, one can obtain free control over the camera, see character and stage hitboxes, frame advance the match, see the parts of the stage, and drop items (similar to Training Mode). Using the "reset" button combination in Classic Mode, Adventure Mode, or All-Star Mode results in a "stage clear".
| Controls | Effect |
|---|---|
| Pauses the game, but without the usual pause interface. | |
| Hard Pause + |
Frame advances the match. |
| Speeds up gameplay. | |
| Shrinks the player. | |
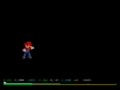
Displays a list of statistics for each player:
| |
| Shows the current score and any bonuses won. | |
| Pauses the game normally during a match. The button combination to quit a match is "Hard pause" when in places where | |
Rotates through multiple visual effects.
| |
Toggles sound effects and music. Displays additional information after going through the first four settings.
| |
| Displays a set of stress bars detailing the GameCube's work load. | |
| Displays each characters' animation information. | |
| Grows the player. | |
| Sets the player back to normal size. | |
Toggles collision bubbles for all characters and stage elements (See #Collision bubble key).
| |
Toggles various stage related visuals, such as spawn points, stage structures, and grab-able ledges (See #Stage visual key).
| |
Toggles various character related visuals
| |
Toggles collision bubbles for the player (See #Collision bubble key).
| |
| Drops item selected on the Item Menu | |
| Display Item Menu and cycle forward through the list (See Debug menu (SSBM)#Items & Pokémon). | |
| Display Item Menu and cycle backward through the list (See Debug menu (SSBM)#Items & Pokémon). | |
| Display Item Menu and cycle forward through Pokémon on the list (See Debug menu (SSBM)#Items & Pokémon). | |
| Display Item Menu and cycle backward through Pokémon on the list (See Debug menu (SSBM)#Items & Pokémon). | |
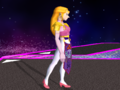
Changes the camera view.
This also removes Peach's and Zelda's dress, presumably used to test for glitched leg movement under the dress. | |
| Used to rotate the camera (free form). | |
| Zooms in and out. | |
| Pans around the screen. |
Stage visual key[edit]
For a collection of stages in their various debug states, see Debug menu (SSBM)/Stage data.
Camera boxes[edit]
| Item | Description |
|---|---|
| Teal Box | Camera Limit |
| Light Yellow Box | Blast Line |
| Blue Box | Camera Focal Box |
| Small Red Box | Indicates the range from which a character can grab a ledge when facing left. When facing right, the box indicates the range from which a character cannot grab a ledge. Certain attacks such as Spin Attack will not alter the boxes in any way, but will allow the opposite facing direction to ledge grab. |
| Small Blue Box | Indicates the range from which a character can grab a ledge when facing right. When facing left, the box indicates the range from which a character cannot grab a ledge. Certain attacks such as Spin Attack will not alter the boxes in any way, but will allow the opposite facing direction to ledge grab. |
Spawn points[edit]
| Item | Description |
|---|---|
| Blue Plus | Character starting point |
| Green Plus | Character respawn point |
| Yellow Plus | Item spawn point |
| Red Plus | Enemy spawn point |
| Magenta Plus | Trophy spawn point |
| White Plus | Exit point |
Structures[edit]
| Item | Description |
|---|---|
| Gray Structure | Stage floor |
| Red Structure | Stage ceiling |
| Blue Structure | Stage left wall |
| Green Structure | Stage right wall |
| Gray Platform | Solid no-grab platform |
| Blue Platform | Drop-through platform |
| Red Platform | Grab platform |
Structures that appear darker than other structures are dynamic, meaning they convert between floor, wall, and ceiling in real-time as they animate. One example is the entirety of Brinstar Depths.
Terrains[edit]
| Item | Description |
|---|---|
| Gray Platform | Basic terrain |
| Brown Platform | Rock terrain |
| Light Green Platform | Grass terrain |
| Dark Red Platform | Dirt terrain |
| Light Brown Platform | Wood terrain |
| Blue Platform | Water terrain |
| Light Blue Platform | Ice terrain |
| White Platform | Snow terrain |
| Dark Gray Platform | Light Metal terrain |
| Dark Brown Platform | Heavy Metal terrain |
| Yellow Platform | Alien Goop terrain |
| Light Gray Platform | Game & Watch terrain |
| Light Yellow Platform | Checkered terrain |
Other[edit]
| Item | Description |
|---|---|
| Orange Box | Item pickup boxes (when a character's hitbox overlaps the item's box, the character can pick it up.) |
Collision bubble key[edit]

This is a list of all hitbox colors and what they are for. For more detail, see Hitbox#Hitbox types.
| Item | Description |
|---|---|
| Yellow | Damageable |
| Red | Attacking |
| Blue | Intangible |
| Purple | Grabbing |
| Green | Invincible |
| Aqua | Reflecting |
| Cyan | Shielding |
| Cyan-Blue | Absorbing |
| White | Special |
Character visual key[edit]
Environment collision boxes (ECB)[edit]
| Item | Description |
|---|---|
| White Diamond Outline | Target ECB position. |
| Orange Diamond | Post-collisions ECB, the target ECB altered to avoid intersecting with stage structures. |
| Dark Orange Diamond | Pre-collision ECB at most recent collision segment. |
| Blue Diamond | Pre-collisions ECB. |
Character position markers[edit]
| Item | Description |
|---|---|
| White Cross | Target Character Position. |
| Brown Cross | Post-collisions character position. |
| Reddish Brown Cross | Pre-collision character position at most recent collision segment. |
| Dark Blue Cross | Pre-collisions character position. |
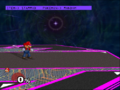
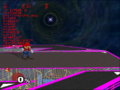
Gallery[edit]
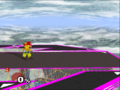
Displays hitboxes for all players and stage elements.
Displays animation information for all players.
Displays the item menu.
Displays scores and bonuses for all players.
Displays scores and bonuses for all players on an overlay.
Displays a list of stats for all players.
Displays stress levels

Peach when rendered without her dress.
Zelda when rendered without her dress.


| Debug menu (SSBM) elements | |
|---|---|
| Characters | Master Hand · Crazy Hand · Male/Female Wire Frames · Giga Bowser · Sandbag · NONE |
| Stages | DUMMY · TEST · AKANEIA · ICETOP/10-2 · Target Test stages · Race to the Finish stage · Trophy Collector · Mushroom Kingdom · Underground Maze · Brinstar Escape Shaft · F-Zero Grand Prix · Icicle Mountain · All-Star Rest Area · Home-Run Stadium · Goomba · Entei · Majora's Mask |
| Menus/modes | Debug menu · Debug sound test menu · DEVELOP mode |
| Miscellaneous | Ditto · List of CPU modes |