Super Smash Bros. Brawl

Ice Climbers (SSBB)/Up throw: Difference between revisions

From SmashWiki, the Super Smash Bros. wiki
Jump to navigationJump to search
(New Page: {{ArticleIcons|ssbb=y}} ==Overview== {{competitive expertise}} ==Throw and Hitbox Data== ===Hitbox=== {{BrawlHitboxTableHeader|special=y}} {{BrawlSpecialHitboxTableRow |bn=23 |id=0 |da...)
 
No edit summary
 
(3 intermediate revisions by one other user not shown)
Line 1: Line 1:
{{ArticleIcons|ssbb=y}}
 
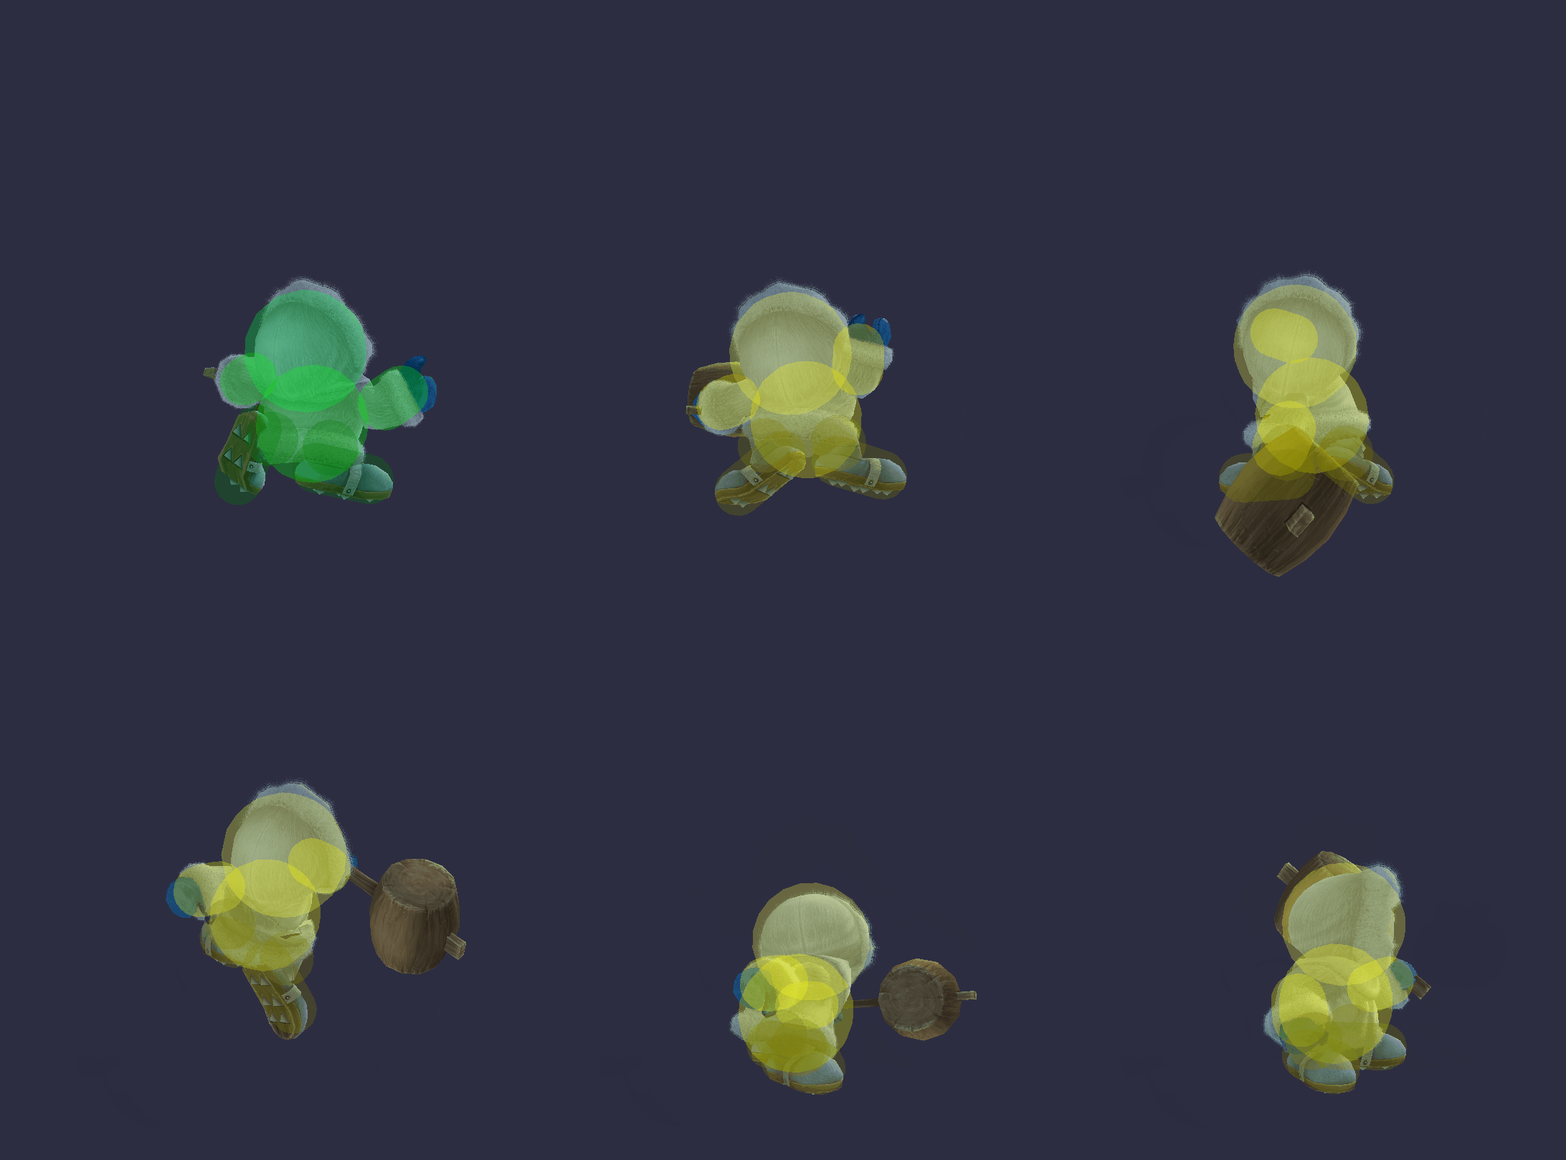
[[File:PopoUThrowSSBB.gif|thumb|300px|Hitbox visualization showing Popo's up throw.]]
==Overview==
==Overview==
{{competitive expertise}}
Line 48: Line 48:
|}
|}
===Throw===
===Throw===
Note: for the partner, the throw type is [[Typeless]].
{{BrawlThrowTableHeader}}
{{BrawlThrowTableRow
Line 58: Line 59:
|fkv=0
|fkv=0
|bn=0
|bn=0
|noff=false
|noff=true
|ff=1.0
|trip=0
|ff=60000
|sdi=60000
|type=Throwing
|type=Throwing
|effect=Normal
|effect=Normal
Line 74: Line 77:
|fkv=0
|fkv=0
|bn=0
|bn=0
|noff=false
|noff=true
|ff=1.0
|trip=0
|ff=60000
|sdi=60000
|type=Throwing
|type=Throwing
|effect=Normal
|effect=Normal
Line 82: Line 87:
}}
}}
|}
|}
==Timing==
==Timing==
{|class="wikitable"
{|class="wikitable"

Latest revision as of 22:33, May 21, 2024

Hitbox visualization showing Popo's up throw.

Overview[edit]

Competitive.png This article or section may require competitive expertise.
You can discuss this issue on the talk page or edit this page to improve it.

Throw and Hitbox Data[edit]

Hitbox[edit]

ID Part Rehit rate Damage SD Angle BK KS FKV Radius Bone Offset SDIx T% Clang Rebound Type Effect G A Sound Direct Blockable Reflectable Absorbable Flinchless Heedless Piercing Strechy ?2 ?5 ?6 ?11 Hit Bits
0 0 0 2% 1 Sakurai angle Forwards 0 0 90 7.2 23 0.0 5.6 0.0 1.0x 0.2x 0% HitboxTableIcon(NoClang).png HitboxTableIcon(NoRebound).png Hammer (type) Normal (effect) HitboxTableIcon(GroundedTrue).png HitboxTableIcon(AerialTrue).png M Kick SpecialsDirect.png HitboxTableIcon(Blockable).png HitboxTableIcon(Unreflectable).png HitboxTableIcon(Unabsorbable).png HitboxTableIcon(False).png HitboxTableIcon(False).png HitboxTableIcon(False).png HitboxTableIcon(False).png HitboxTableIcon(False).png HitboxTableIcon(True).png HitboxTableIcon(False).png HitboxTableIcon(False).png 11111111111111
1 0 0 2% 1 Sakurai angle Forwards 0 0 90 5.76 23 0.0 0.0 0.0 1.0x 0.2x 0% HitboxTableIcon(NoClang).png HitboxTableIcon(NoRebound).png Hammer (type) Normal (effect) HitboxTableIcon(GroundedTrue).png HitboxTableIcon(AerialTrue).png M Kick SpecialsDirect.png HitboxTableIcon(Blockable).png HitboxTableIcon(Unreflectable).png HitboxTableIcon(Unabsorbable).png HitboxTableIcon(False).png HitboxTableIcon(False).png HitboxTableIcon(False).png HitboxTableIcon(False).png HitboxTableIcon(False).png HitboxTableIcon(True).png HitboxTableIcon(False).png HitboxTableIcon(False).png 11111111111111

Throw[edit]

Note: for the partner, the throw type is Typeless.

ID Damage Angle BK KS FKV Bone SDIx FFx T% Type Effect Sound
0 4% AngleIcon88.png Forwards 120 28 0 0 1.0x None 0% Throwing (type) Normal (effect) S None
1 3% Sakurai angle Forwards 40 100 0 0 1.0x None 0% Throwing (type) Normal (effect) S None

Timing[edit]

Invincibility 1-8
Hitbox 25
Throw Release 26
Animation length 53
FrameIcon(Lag).png FrameIcon(Lag).png FrameIcon(Lag).png FrameIcon(Lag).png FrameIcon(Lag).png FrameIcon(Lag).png FrameIcon(Lag).png FrameIcon(Lag).png FrameIcon(Lag).png FrameIcon(Lag).png FrameIcon(Lag).png FrameIcon(Lag).png FrameIcon(Lag).png FrameIcon(Lag).png FrameIcon(Lag).png FrameIcon(Lag).png FrameIcon(Lag).png FrameIcon(Lag).png FrameIcon(Lag).png FrameIcon(Lag).png FrameIcon(Lag).png FrameIcon(Lag).png FrameIcon(Lag).png FrameIcon(Lag).png FrameIcon(HitboxThrowS).png FrameIcon(LagThrowE).png FrameIcon(Lag).png FrameIcon(Lag).png FrameIcon(Lag).png FrameIcon(Lag).png FrameIcon(Lag).png FrameIcon(Lag).png FrameIcon(Lag).png FrameIcon(Lag).png FrameIcon(Lag).png FrameIcon(Lag).png FrameIcon(Lag).png FrameIcon(Lag).png FrameIcon(Lag).png FrameIcon(Lag).png FrameIcon(Lag).png FrameIcon(Lag).png FrameIcon(Lag).png FrameIcon(Lag).png FrameIcon(Lag).png FrameIcon(Lag).png FrameIcon(Lag).png FrameIcon(Lag).png FrameIcon(Lag).png FrameIcon(Lag).png FrameIcon(Lag).png FrameIcon(Lag).png FrameIcon(Lag).png
FrameIcon(Invincible).png FrameIcon(Invincible).png FrameIcon(Invincible).png FrameIcon(Invincible).png FrameIcon(Invincible).png FrameIcon(Invincible).png FrameIcon(Invincible).png FrameIcon(Invincible).png FrameIcon(Vulnerable).png FrameIcon(Vulnerable).png FrameIcon(Vulnerable).png FrameIcon(Vulnerable).png FrameIcon(Vulnerable).png FrameIcon(Vulnerable).png FrameIcon(Vulnerable).png FrameIcon(Vulnerable).png FrameIcon(Vulnerable).png FrameIcon(Vulnerable).png FrameIcon(Vulnerable).png FrameIcon(Vulnerable).png FrameIcon(Vulnerable).png FrameIcon(Vulnerable).png FrameIcon(Vulnerable).png FrameIcon(Vulnerable).png FrameIcon(Vulnerable).png FrameIcon(Vulnerable).png FrameIcon(Vulnerable).png FrameIcon(Vulnerable).png FrameIcon(Vulnerable).png FrameIcon(Vulnerable).png FrameIcon(Vulnerable).png FrameIcon(Vulnerable).png FrameIcon(Vulnerable).png FrameIcon(Vulnerable).png FrameIcon(Vulnerable).png FrameIcon(Vulnerable).png FrameIcon(Vulnerable).png FrameIcon(Vulnerable).png FrameIcon(Vulnerable).png FrameIcon(Vulnerable).png FrameIcon(Vulnerable).png FrameIcon(Vulnerable).png FrameIcon(Vulnerable).png FrameIcon(Vulnerable).png FrameIcon(Vulnerable).png FrameIcon(Vulnerable).png FrameIcon(Vulnerable).png FrameIcon(Vulnerable).png FrameIcon(Vulnerable).png FrameIcon(Vulnerable).png FrameIcon(Vulnerable).png FrameIcon(Vulnerable).png FrameIcon(Vulnerable).png
Legend (1 square = 1 frame)
Lag
Lag time
Hitbox
Hitbox
FrameIcon(Vulnerable).png
Vulnerable
Invincibility
Invincible
ThrowThrow
Throw point