Welcome to SmashWiki! Log in or create an account and join the community, and don't forget to read this first!
Notices
The Skill parameter has been removed from Smasher infoboxes, and in its place are the new "Best historical ranking" and "Best tournament result" parameters. SmashWiki needs help adding these new parameters to Smasher infoboxes, refer to the guidelines here for what should be included in these new parameters.
When adding results to Smasher pages, include each tournament's entrant number in addition to the player's placement, and use the {{Trn}} template with the matching game specified. Please also fix old results on Smasher pages that do not abide to this standard. Refer to our Smasher article guidelines to see how results tables should be formatted.
Check out our project page for ongoing projects that SmashWiki needs help with.
Super Smash Bros. Brawl

Yoshi (SSBB)/Hitboxes: Difference between revisions

From SmashWiki, the Super Smash Bros. wiki
Jump to navigationJump to search
No edit summary
No edit summary
(17 intermediate revisions by 12 users not shown)
Line 1: Line 1:
{{ArticleIcons|ssbb=y}}
{| class="messagebox" style="background:#ffffff;border:solid #7f7f7f 2px;text-align:center;"
{{incomplete|not everything is yet animated}}
 
==Hitboxes==
{|class="wikitable sortable"
!Move
!Name
!Hitbox
|-
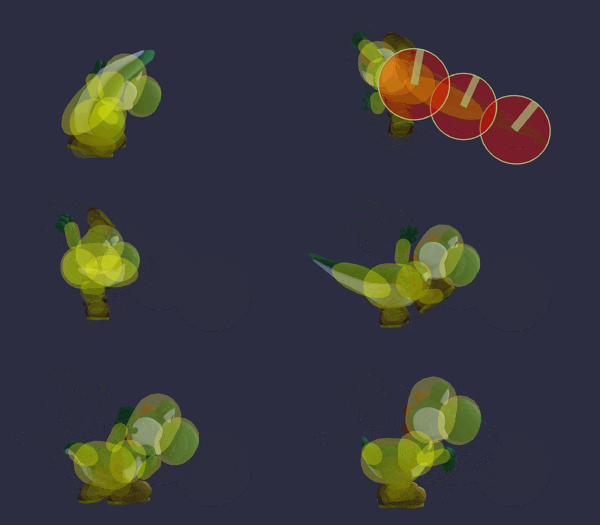
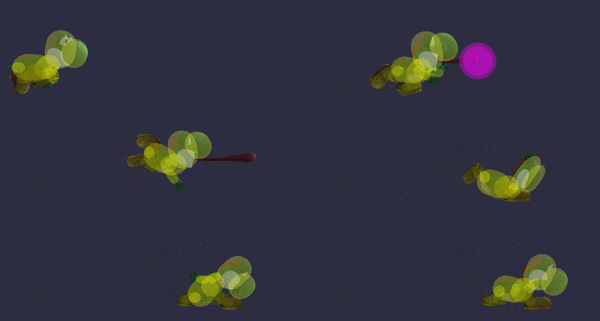
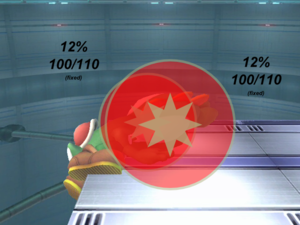
|Neutral attack 1|| ||[[File:YoshiJab1SSBB.gif|300px]]
|-
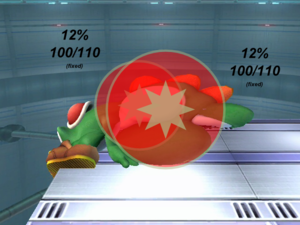
|Neutral attack 2|| ||[[File:YoshiJab2SSBB.gif|300px]]
|-
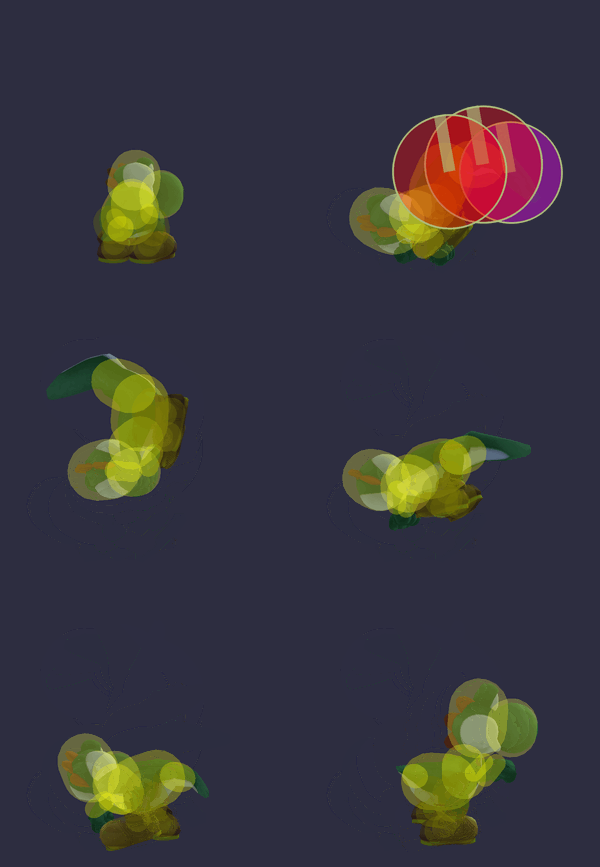
|Forward tilt|| ||[[File:YoshiFTiltSSBB.gif|300px]]
|-
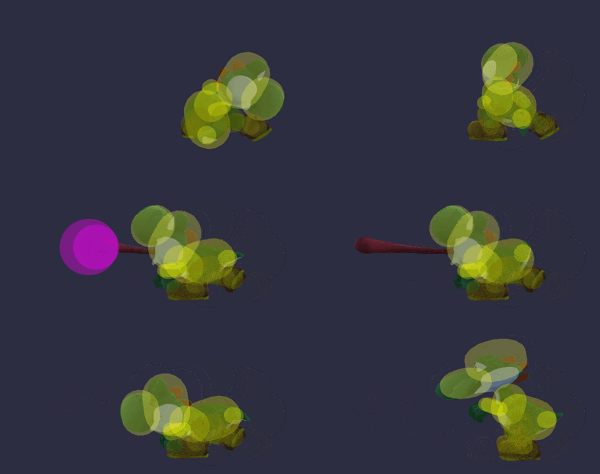
|Forward tilt (angled up)|| ||[[File:YoshiFTiltUpSSBB.gif|300px]]
|-
|Forward tilt (angled down)|| ||[[File:YoshiFTiltDownSSBB.gif|300px]]
|-
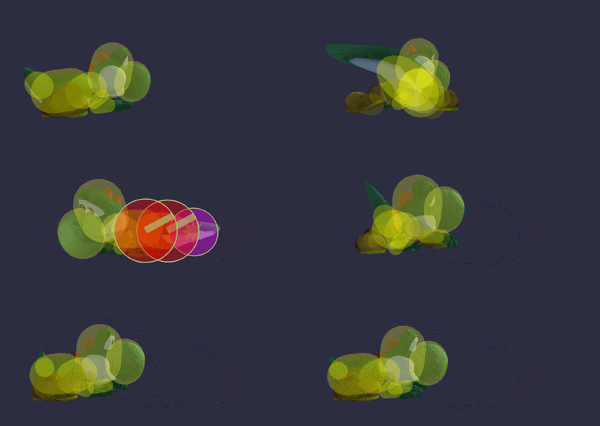
|Up tilt|| ||[[File:YoshiUTiltSSBB.gif|300px]]
|-
|-
|width="50px"|[[Image:Hitbox Article.png|50px]]
|Down tilt|| ||[[File:YoshiDTiltSSBB.gif|300px]]
|'''This is a hitbox repository.'''
|width="50px"|[[Image:Hitbox Article.png|50px]]
|-
|-
|colspan="3"|Click on any image to view full size.
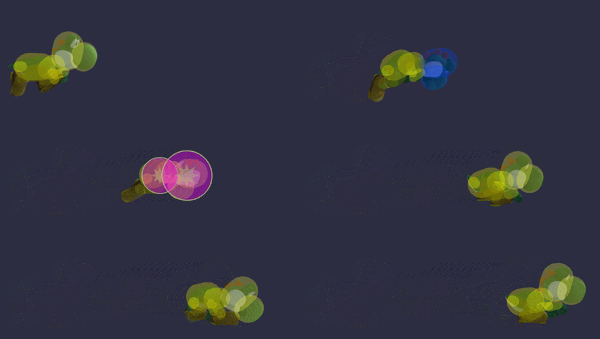
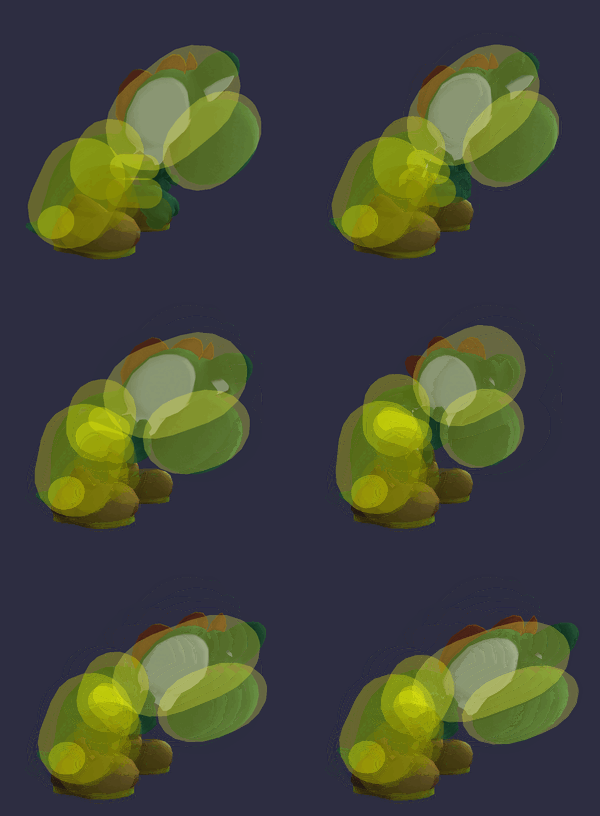
|Dash attack|| ||[[File:YoshiDashAttackSSBB.gif|300px]]
|}
 
{|class="wikitable" style="margin:1em auto 1em auto; text-align:center"
!Hurtboxes
|-
|-
|[[Image:YoshiSSBBHurtboxes.png|200px]]
|Forward smash|| ||[[File:YoshiFSmashSSBB.gif|300px]]
|}
 
{|class="wikitable collapsible collapsed" style="margin:1em auto 1em auto; text-align:center"
!colspan="4"|Color Legend
|-
|-
!colspan="3"|Types!!colspan="1"|Effects
|Forward smash (angled up)|| ||[[File:YoshiFSmashUpSSBB.gif|300px]]
|-
|-
|style="background:#ff7f7f"|{{AttackType|type=Head}}
|Forward smash (angled down)|| ||[[File:YoshiFSmashDownSSBB.gif|300px]]
|style="background:#ffbf7f"|{{AttackType|type=Foot}}
|style="background:#7fff7f"|{{AttackType|type=Tail}}
|style="background:#d7d7bf"|{{AttackType|effect=Normal}}
|-
|-
|style="background:#ff0000"|Head
|Up smash|| ||[[File:YoshiUSmashSSBB.gif|300px]]
|style="background:#ff7f00"|Foot
|style="background:#00ff00"|Tail
|style="background:#afaf7f"|Normal
|}
 
{|class="wikitable" style="margin:1em auto 1em auto; text-align:center"
|-
|-
!colspan="7"|Yoshi's Hitboxes
|Down smash|| ||[[File:YoshiDSmashSSBB.gif|300px]]
|-
|-
|Neutral<br>(Double Kick)||colspan="2"|[[Image:YoshiSSBBNeutral(hit1).png|200px]]<br>Hit 1||colspan="2"|[[Image:YoshiSSBBNeutral(hit2start).png|200px]]<br>Hit 2||colspan="2"|[[Image:YoshiSSBBNeutral(hit2end).png|200px]]<br>Hit 2
|Neutral aerial|| ||[[File:YoshiNAirSSBB.gif|300px]]
|-
|-
|F-Tilt<br>(Tail Swat)||colspan="2"|[[Image:YoshiSSBBFTilt(angup).png|200px]]<br>Angled up||colspan="2"|[[Image:YoshiSSBBFTilt(angside).png|200px]]<br>Angled side||colspan="2"|[[Image:YoshiSSBBFTilt(angdown).png|200px]]<br>Angled down
|Forward aerial|| ||[[File:YoshiFAirSSBB.gif|300px]]
|-
|-
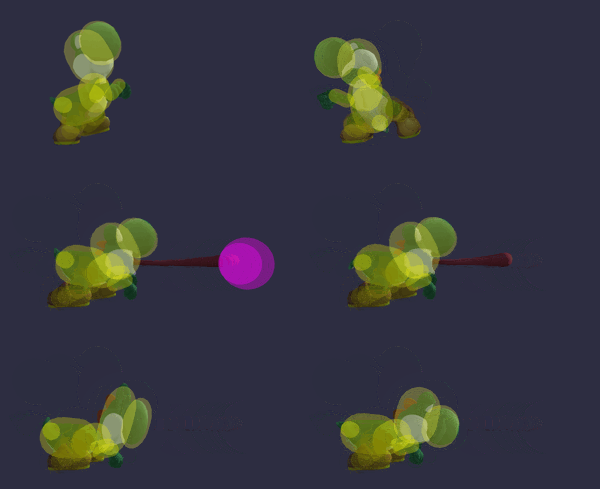
|rowspan="2"|U-Tilt<br>(Tail Flip)||colspan="3"|[[Image:YoshiSSBBUTilt(part1).png|200px]]||colspan="3"|[[Image:YoshiSSBBUTilt(part2).png|200px]]
|Back aerial|| ||[[File:YoshiBAirSSBB.gif|300px]]
|-
|-
|colspan="3"|[[Image:YoshiSSBBUTilt(part3).png|200px]]||colspan="3"|[[Image:YoshiSSBBUTilt(part4).png|200px]]
|Up aerial|| ||[[File:YoshiUAirSSBB.gif|300px]]
|-
|-
|D-Tilt<br>(Tail Trip)||colspan="6"|[[Image:YoshiSSBBDTilt.png|200px]]
|Down aerial|| ||[[File:YoshiDAirSSBB.gif|300px]]
|-
|-
|Dash<br>(Head Ram)||colspan="3"|[[Image:YoshiSSBBDash(clean).png|200px]]<br>Clean||colspan="3"|[[Image:YoshiSSBBDash(late).png|200px]]<br>Late
|Neutral special||Egg Lay||[[File:YoshiEggLaySSBB.gif|300px]]
|-
|-
|U-Smash<br>(Nasal Crush)||colspan="2"|[[Image:YoshiSSBBUSmash(start).png|200px]]||colspan="2"|[[Image:YoshiSSBBUSmash(mid).png|200px]]||colspan="2"|[[Image:YoshiSSBBUSmash(end).png|200px]]
|Side special||Egg Roll||[[File:YoshiSSBBSS(ground).png|300px]]<br>[[File:YoshiSSBBSS(air).png|300px]]
|-
|-
|D-Smash<br>(Tail Sweep)||colspan="3"|[[Image:YoshiSSBBDSmash(hit1).png|200px]]<br>Hit 1||colspan="3"|[[Image:YoshiSSBBDSmash(hit2).png|200px]]<br>Hit 2
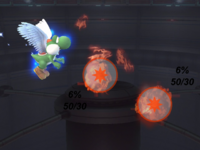
|Up special||Egg Throw||[[File:YoshiSSBBUS(egg).png|300px]]<br>[[File:YoshiSSBBUS(explosion).png|300px]]
|-
|-
|F-Smash<br>(Noggin Flail)||colspan="2"|[[Image:YoshiSSBBFSmash(angup).png|200px]]<br>Angled up||colspan="2"|[[Image:YoshiSSBBFSmash(angside).png|200px]]<br>Angled side||colspan="2"|[[Image:YoshiSSBBFSmash(angdown).png|200px]]<br>Angled down
|Down special||Yoshi Bomb||[[File:YoshiYoshiBombGSSBB.gif|300px]]<br>[[File:YoshiYoshiBombASSBB.gif|300px]]<br>[[File:YoshiSSBBDS(stars).png|300px]]
|-
|-
|rowspan="2"|Nair<br>(Drop Kick)||colspan="3"|[[Image:YoshiSSBBNair(cleanstart).png|200px]]<br>Clean||colspan="3"|[[Image:YoshiSSBBNair(cleanend).png|200px]]<br>Clean
|Final Smash||Super Dragon||[[File:YoshiSSBBFS(ram).png|300px]]<br>[[File:YoshiSSBBFS(firebreath).png|200px]]<br>[[File:YoshiSSBBFS(fireball).png|200px]]
|-
|-
|colspan="3"|[[Image:YoshiSSBBNair(mid).png|200px]]<br>Mid||colspan="3"|[[Image:YoshiSSBBNair(late).png|200px]]<br>Late
|Grab|| ||[[File:YoshiGrabSSBB.gif|300px]]
|-
|-
|Fair<br>(Nose Pound)||colspan="3"|[[Image:YoshiSSBBFair(start).png|200px]]||colspan="3"|[[Image:YoshiSSBBFair(end).png|200px]]
|Dash grab|| ||[[File:YoshiDashGrabSSBB.gif|300px]]
|-
|-
|rowspan="4"|Bair<br>(Tail Wag)||colspan="2"|[[Image:YoshiSSBBBair(hit1start).png|200px]]||colspan="2"|[[Image:YoshiSSBBBair(hit1mid).png|200px]]<br>Hit 1||colspan="2"|[[Image:YoshiSSBBBair(hit1end).png|200px]]
|Pivot grab|| ||[[File:YoshiPivotGrabSSBB.gif|300px]]
|-
|-
|colspan="2"|[[Image:YoshiSSBBBair(hit2start).png|200px]]||colspan="2"|[[Image:YoshiSSBBBair(hit2mid).png|200px]]<br>Hit 2||colspan="2"|[[Image:YoshiSSBBBair(hit2end).png|200px]]
|Pummel|| ||[[File:YoshiPummelSSBB.gif|300px]]
|-
|-
|colspan="2"|[[Image:YoshiSSBBBair(hit3start).png|200px]]||colspan="2"|[[Image:YoshiSSBBBair(hit3mid).png|200px]]<br>Hit 3||colspan="2"|[[Image:YoshiSSBBBair(hit3end).png|200px]]
|Floor attack (front)|| ||[[File:YoshiSSBBFloor(fronthit1).png|300px]]<br>[[File:YoshiSSBBFloor(floorhit2).png|300px]]
|-
|-
|colspan="2"|[[Image:YoshiSSBBBair(hit4start).png|200px]]||colspan="2"|[[Image:YoshiSSBBBair(hit4mid).png|200px]]<br>Hit 4||colspan="2"|[[Image:YoshiSSBBBair(hit4end).png|200px]]
|Floor attack (back)|| ||[[File:YoshiSSBBFloor(backhit1).png|300px]]<br>[[File:YoshiSSBBFloor(backhit2).png|300px]]
|-
|-
|Uair<br>(Vertical Sweep)||colspan="6"|[[Image:YoshiSSBBUair.png|200px]]
|Floor attack (trip)|| ||[[File:YoshiSSBBFloor(triphit1).png|300px]]<br>[[File:YoshiSSBBFloor(triphit2).png|300px]]
|-
|-
|Dair<br>(Foot Flurry)||colspan="3"|[[Image:YoshiSSBBDair(hits1-7).png|200px]]<br>Hits 1-7||colspan="3"|[[Image:YoshiSSBBDair(hits8-14).png|200px]]<br>Hits 8-14
|Edge attack (fast)|| ||[[File:YoshiSSBBEdge(fast).png|300px]]
|-
|-
|Shield||colspan="6"|[[Image:YoshiSSBBShield.png|200px]]
|Edge attack (slow)|| ||[[File:YoshiSSBBEdge(slowstart).png|300px]]<br>[[File:YoshiSSBBEdge(slowend).png|300px]]
|}
|}
===Notes===
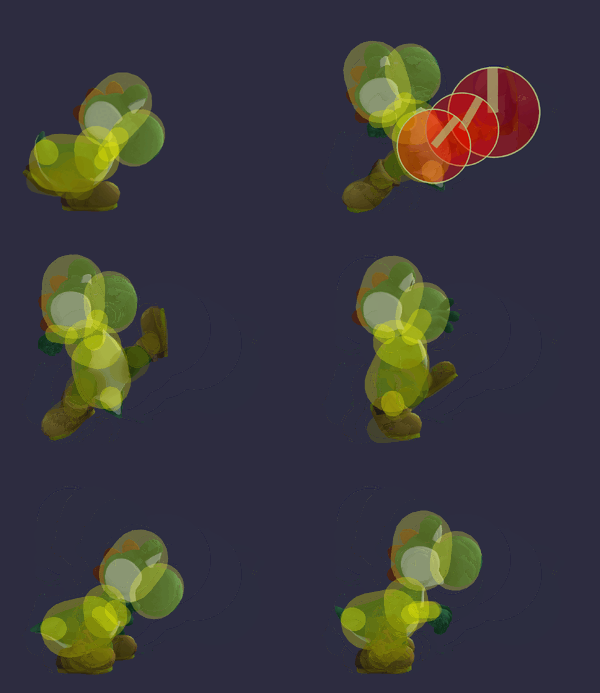
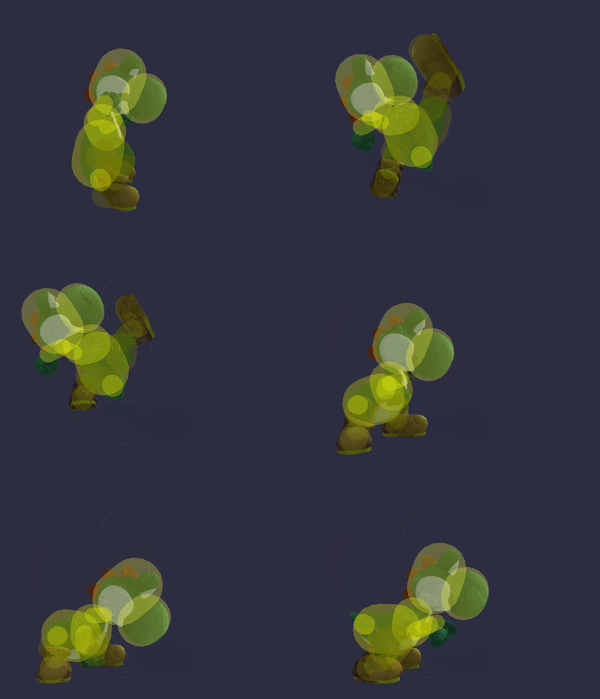
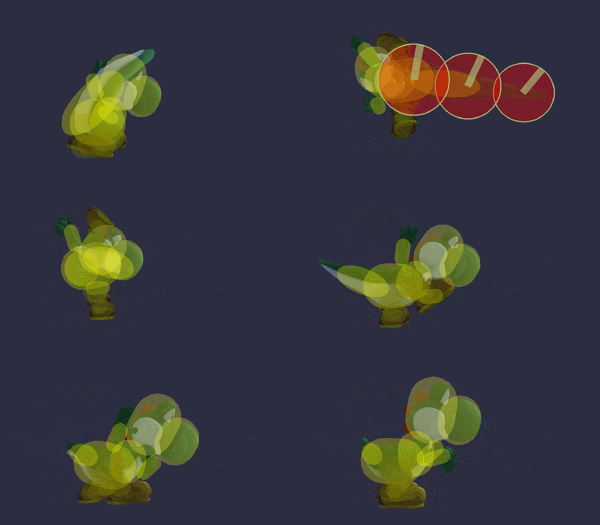
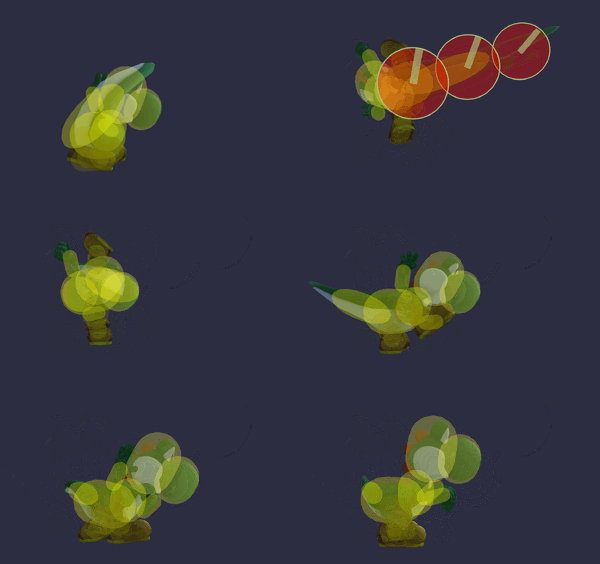
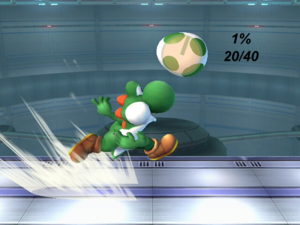
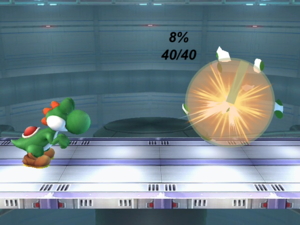
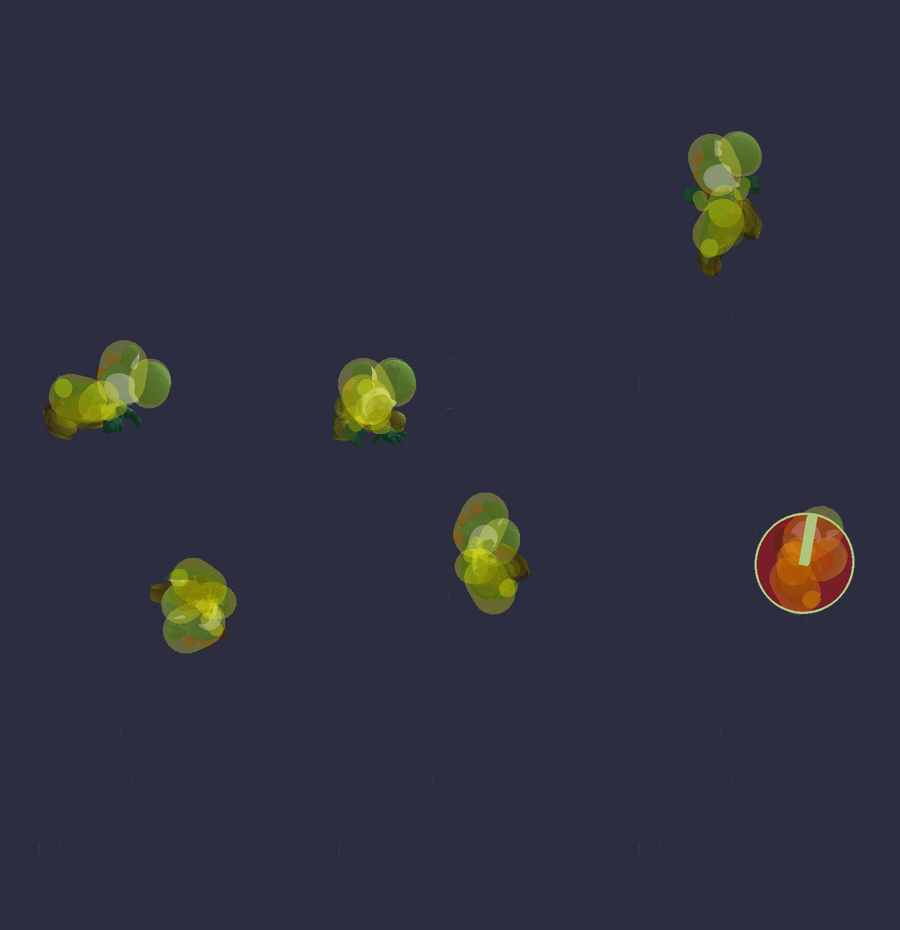
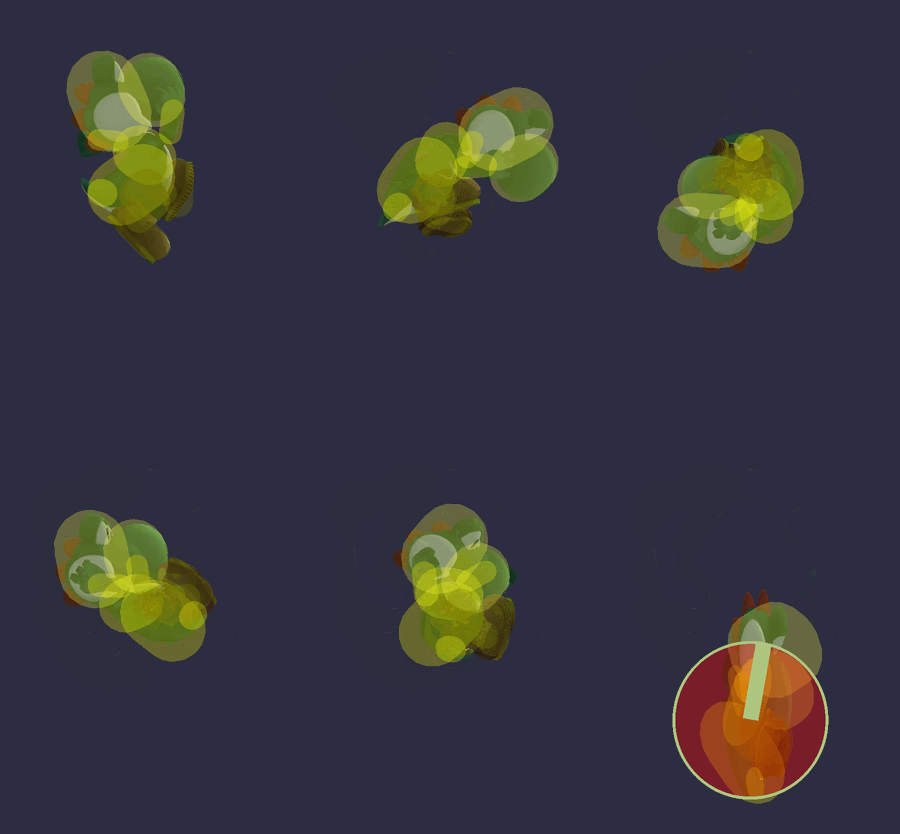
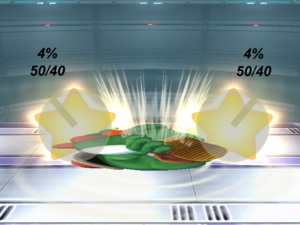
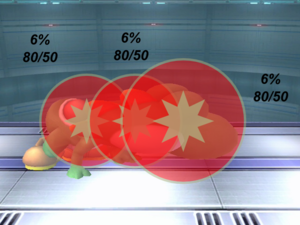
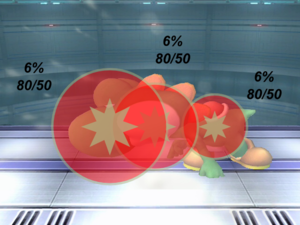
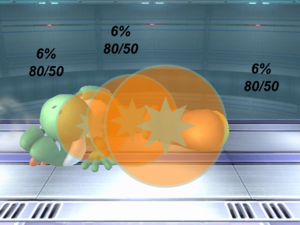
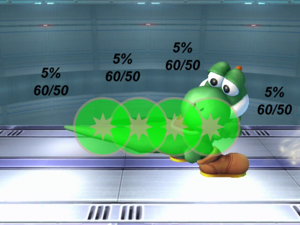
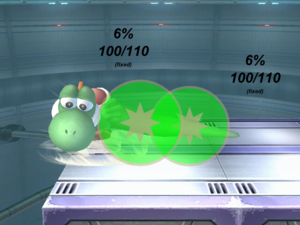
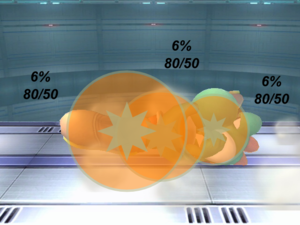
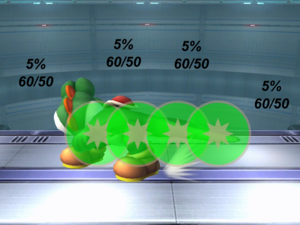
*The angle of a hitbox is displayed as a line. Note that all angles are based on what side of the attacker the target is on - if the target is on the opposite side of the attacker, they will fly in the opposite direction (but at the same angle). Most presented angles assume the target is on the right of the attacker, unless the attack is obviously on the attacker's left.
**An angle indicated with a star (*) is the [[Sakurai angle]].
**An angle indicated with a dash (-) is the [[autolink angle]].
*A transcendent hitbox is denoted by a dashed border.
*The colour of a hitbox is its type; the colour of its angle indicator and border is its effect.
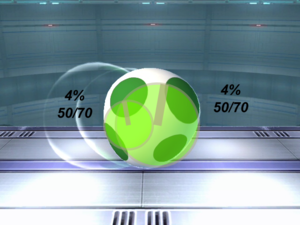
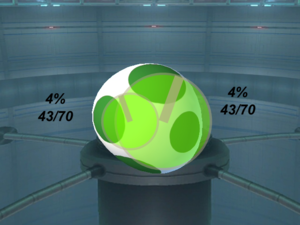
*The numbers represent each hitbox's damage and knockback (base knockback/knockback scaling), as well as whether the knockback is fixed.


[[Category:Hitbox repositories]]
[[Category:Hitbox repositories]]
[[Category:Yoshi (SSBB)]]
[[Category:Hitboxes (SSBB)]]

Revision as of 12:15, May 19, 2024

An icon for denoting incomplete things.

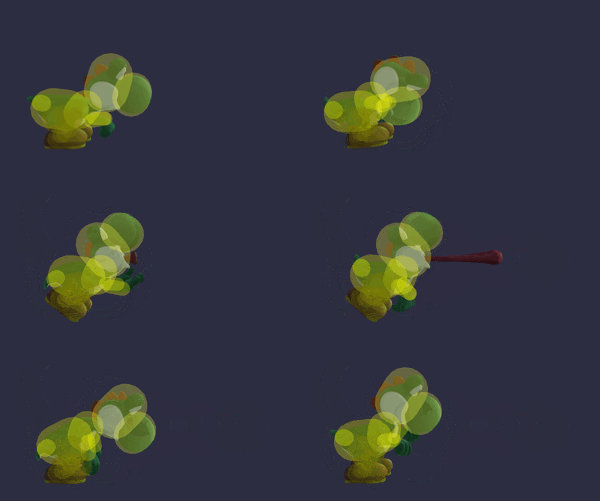
Hitboxes

Move Name Hitbox
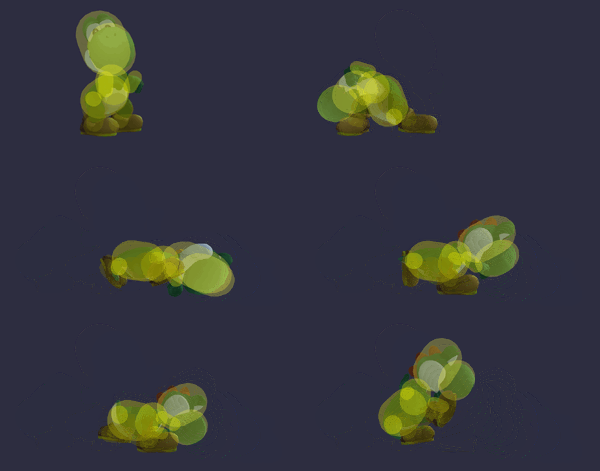
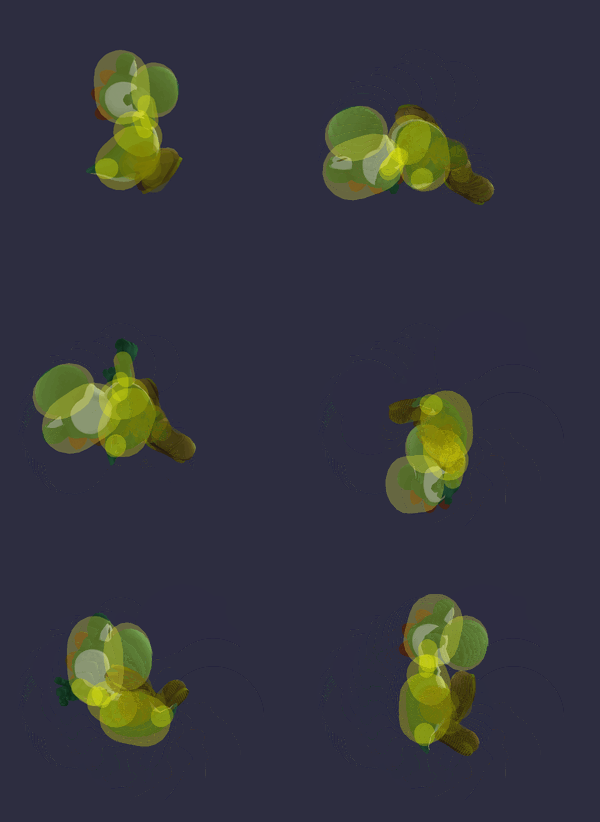
Neutral attack 1 YoshiJab1SSBB.gif
Neutral attack 2 YoshiJab2SSBB.gif
Forward tilt YoshiFTiltSSBB.gif
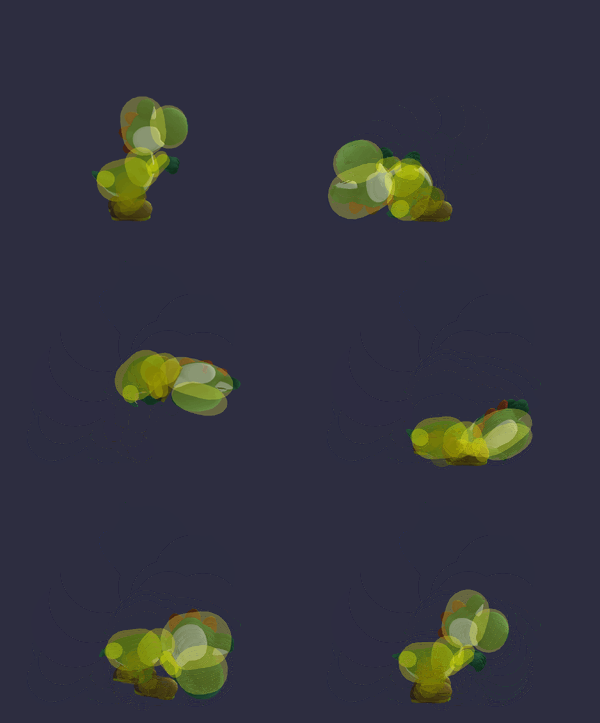
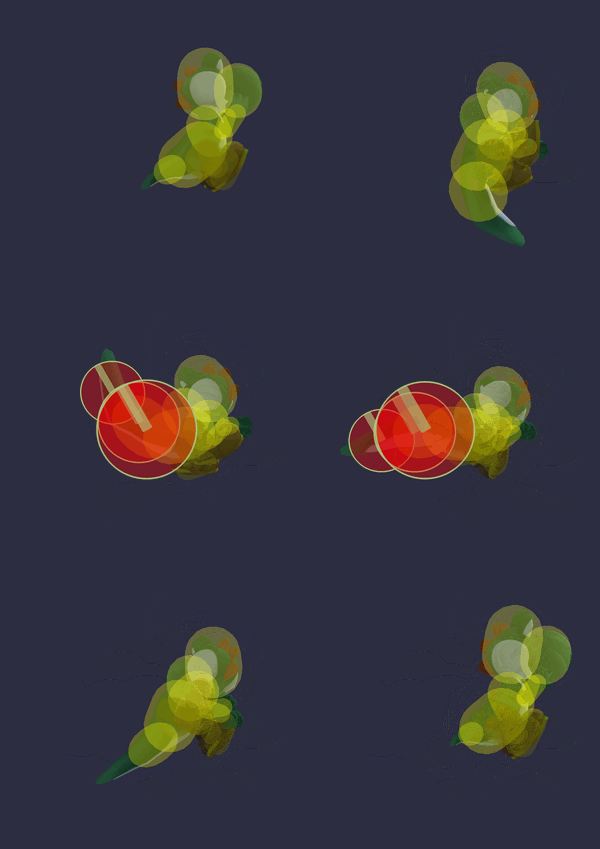
Forward tilt (angled up) YoshiFTiltUpSSBB.gif
Forward tilt (angled down) YoshiFTiltDownSSBB.gif
Up tilt YoshiUTiltSSBB.gif
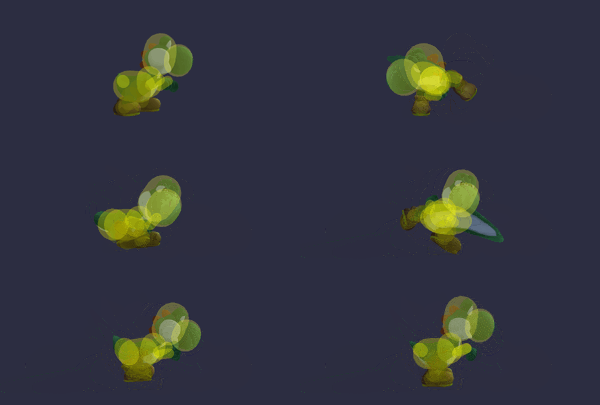
Down tilt YoshiDTiltSSBB.gif
Dash attack YoshiDashAttackSSBB.gif
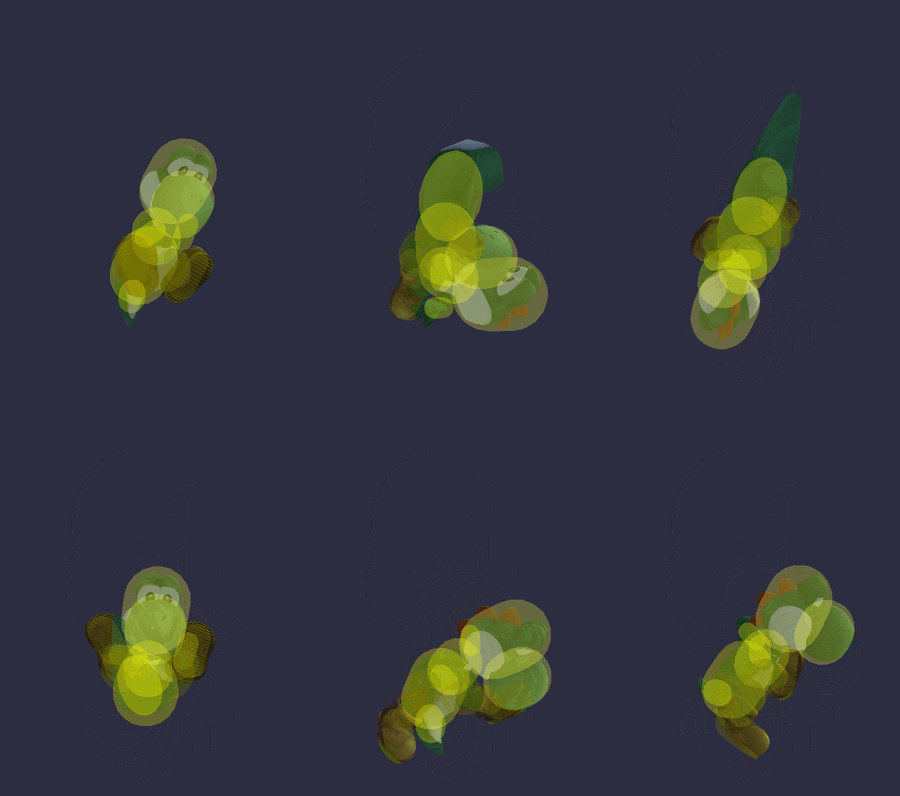
Forward smash YoshiFSmashSSBB.gif
Forward smash (angled up) YoshiFSmashUpSSBB.gif
Forward smash (angled down) YoshiFSmashDownSSBB.gif
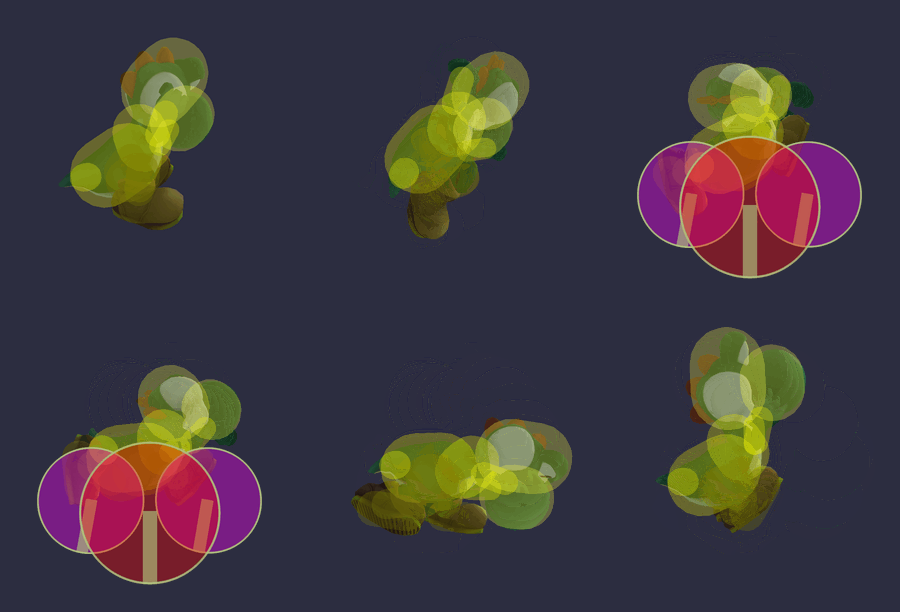
Up smash YoshiUSmashSSBB.gif
Down smash YoshiDSmashSSBB.gif
Neutral aerial YoshiNAirSSBB.gif
Forward aerial YoshiFAirSSBB.gif
Back aerial YoshiBAirSSBB.gif
Up aerial YoshiUAirSSBB.gif
Down aerial YoshiDAirSSBB.gif
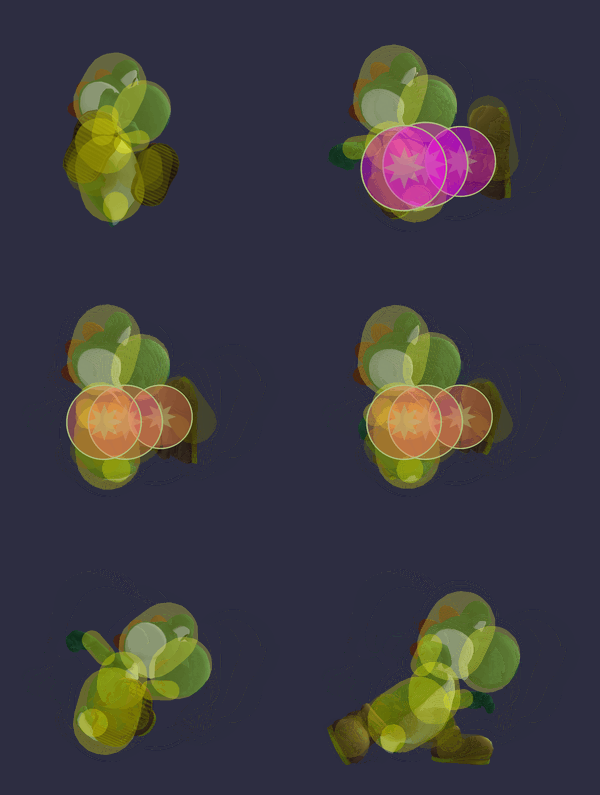
Neutral special Egg Lay YoshiEggLaySSBB.gif
Side special Egg Roll YoshiSSBBSS(ground).png
YoshiSSBBSS(air).png
Up special Egg Throw YoshiSSBBUS(egg).png
YoshiSSBBUS(explosion).png
Down special Yoshi Bomb YoshiYoshiBombGSSBB.gif
YoshiYoshiBombASSBB.gif
YoshiSSBBDS(stars).png
Final Smash Super Dragon YoshiSSBBFS(ram).png
YoshiSSBBFS(firebreath).png
YoshiSSBBFS(fireball).png
Grab YoshiGrabSSBB.gif
Dash grab YoshiDashGrabSSBB.gif
Pivot grab YoshiPivotGrabSSBB.gif
Pummel YoshiPummelSSBB.gif
Floor attack (front) YoshiSSBBFloor(fronthit1).png
YoshiSSBBFloor(floorhit2).png
Floor attack (back) YoshiSSBBFloor(backhit1).png
YoshiSSBBFloor(backhit2).png
Floor attack (trip) YoshiSSBBFloor(triphit1).png
YoshiSSBBFloor(triphit2).png
Edge attack (fast) YoshiSSBBEdge(fast).png
Edge attack (slow) YoshiSSBBEdge(slowstart).png
YoshiSSBBEdge(slowend).png