Absorbing Vortex: Difference between revisions
mNo edit summary |
m (Undid edit by 152.172.1.179: Lucas can too) Tag: Undo |
||
| (17 intermediate revisions by 17 users not shown) | |||
| Line 3: | Line 3: | ||
{{Infobox Special Move | {{Infobox Special Move | ||
|name=Absorbing Vortex | |name=Absorbing Vortex | ||
|image=[[File: | |image=[[File:Mii Gunner Down B 3 SSBU.gif|250px]] | ||
|caption=The move in use. | |caption=The move in use. | ||
|user=[[Mii Gunner]] | |user=[[Mii Gunner]] | ||
|universe={{uv|Super Smash Bros.}} | |universe={{uv|Super Smash Bros.}} | ||
}} | }} | ||
'''Absorbing Vortex''' ({{ja|アブソーバー|Abusōbā}}, ''Absorber'') is one of three [[down special move]]s for the | |||
'''Absorbing Vortex''' ({{ja|アブソーバー|Abusōbā}}, ''Absorber'') is one of three [[down special move]]s for the [[Mii|Mii Gunner]]. | |||
==Overview== | |||
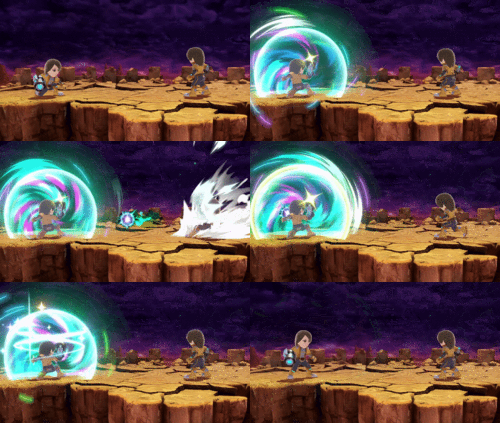
When used, the Gunner can [[absorb]] energy-based projectiles that heal some damage upon absorption, similarly to [[PSI Magnet]]. Using this move after a jump pushes the Mii Gunner upward slightly, increasing recovery distance. | |||
Much like Lucas and Ness' [[PSI Magnet]], upon absorbing a projectile, tapping the control stick or control pad (depending on controller) in a direction will cause the Mii Gunner to roll in that direction, sidestep, or jump without having to release the attack first. | |||
The move received several buffs in the transition to ''Ultimate''. Its healing multiplier has been increased while its endlag has been decreased, and it now produces a weak hitbox upon startup, thus making it safer to use. Compared to the hitbox found on Ness's equivalent special, it is harder to combo out of due to the Gunner's low mobility, but the hitbox itself is larger, making it better as an escape or defensive option. | |||
==Instructional quote== | |||
{{InstructionalQuotes | |||
|ssbuchar=Mii Gunner | |||
|ssbudesc=Creates a barrier that pulls in enemy projectiles and weak explosions to heal damage. | |||
}} | |||
==Customization== | ==Customization== | ||
Special Move customization was added in ''[[Super Smash Bros. 4]]''. These are the variations: | Special Move customization was added in ''[[Super Smash Bros. 4]]'' and returns in ''[[Super Smash Bros. Ultimate]]'' for the {{SSBU|Mii Fighter}}s. These are the variations: | ||
{{CustomSet|MiiGun|Down|name1=Echo Reflector|desc1=Reflects enemy projectiles, sending them back even stronger than they were before.|name2=Bomb Drop|desc2=A thrown bomb that rolls a short distance on the ground.|name3=Absorbing Vortex|desc3=Sucks in enemy projectiles, forming a barrier that also heals your damage.|main=3}} | {{CustomSet|MiiGun|Down|name1=Echo Reflector|desc1=Reflects enemy projectiles, sending them back even stronger than they were before.|name2=Bomb Drop|desc2=A thrown bomb that rolls a short distance on the ground.|name3=Absorbing Vortex|desc3=Sucks in enemy projectiles, forming a barrier that also heals your damage.|main=3}} | ||
===''Ultimate''=== | |||
{| class="wikitable" | |||
!width="50px"|1. [[Echo Reflector]] | |||
!width="50px"|2. [[Bomb Drop]] | |||
!width="50px" style="background:rgba(255,255,0,0.5)"|3. Absorbing Vortex | |||
|- | |||
|width="50px"|[[File:Mii Gunner SSBU Skill Preview Down Special 1.png|200px|center|link=Echo Reflector]] | |||
|width="50px"|[[File:Mii Gunner SSBU Skill Preview Down Special 2.png|200px|center|link=Bomb Drop]] | |||
|width="50px" style="background:rgba(255,255,0,0.33)"|[[File:Mii Gunner SSBU Skill Preview Down Special 3.png|200px|center]] | |||
|- | |||
|width="50px"|''"Reflects enemy projectiles, sending them back even stronger than they were before."'' | |||
|width="50px"|''"Rolls a bomb forward. It detonates after a short while or by triggering the move again."'' | |||
|width="50px" style="background:rgba(255,255,0,0.33)"|''"Creates a barrier that pulls in enemy projectiles and weak explosions to heal damage."'' | |||
|} | |||
{{clr}} | |||
==Gallery== | |||
<gallery> | |||
Absorber.jpg|In {{for3ds}} | |||
Mii Gunner SSBU Skill Preview Down Special 3.png|Absorbing Vortex as shown by the [[Move List]] in ''Ultimate''. | |||
</gallery> | |||
==Names in other languages== | |||
{{langtable | |||
|ja={{ja|アブソーバー|Abusōbā}}, ''Absorber'' | |||
|en=Absorbing Vortex | |||
|fr_ca=Champ de force | |||
|es_la=Absorción | |||
|de=Vortex-Schild | |||
|it=Vortice difensivo | |||
|nl=Absorptieschild | |||
|ru={{rollover|Поглотитель|Poglotitel|?}} | |||
|ko={{rollover|앱소버|Aepsobeo|?}}, ''Absorber'' | |||
|zh_cn={{rollover|吸纳能量|Xīnà Néngliàng|?}} | |||
|zh_tw={{rollover|吸納能量|Xīnà Néngliàng|?}} | |||
}} | |||
==Trivia== | |||
*If the [[Shadow]] [[Assist Trophy]] freezes Mii Gunner while Absorbing Vortex is active, it remains fully functional while frozen, being able and absorb attacks and heal as normal. | |||
**This interaction causes a visual quirk of the Absorbing Vortex effect acting at normal speed while frozen despite Mii Gunner not moving and the affect being slowed while in Shadow's slowdown. | |||
{{Multiple Special Moves/Mii|Gunner}} | {{Multiple Special Moves/Mii|Gunner}} | ||
Latest revision as of 14:02, March 6, 2024
| Absorbing Vortex | |
|---|---|
 The move in use. | |
| User | Mii Gunner |
| Universe | Super Smash Bros. |
Absorbing Vortex (アブソーバー, Absorber) is one of three down special moves for the Mii Gunner.
Overview[edit]
When used, the Gunner can absorb energy-based projectiles that heal some damage upon absorption, similarly to PSI Magnet. Using this move after a jump pushes the Mii Gunner upward slightly, increasing recovery distance.
Much like Lucas and Ness' PSI Magnet, upon absorbing a projectile, tapping the control stick or control pad (depending on controller) in a direction will cause the Mii Gunner to roll in that direction, sidestep, or jump without having to release the attack first.
The move received several buffs in the transition to Ultimate. Its healing multiplier has been increased while its endlag has been decreased, and it now produces a weak hitbox upon startup, thus making it safer to use. Compared to the hitbox found on Ness's equivalent special, it is harder to combo out of due to the Gunner's low mobility, but the hitbox itself is larger, making it better as an escape or defensive option.
Instructional quote[edit]
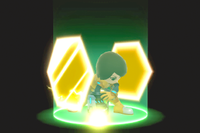
| Creates a barrier that pulls in enemy projectiles and weak explosions to heal damage. |
Customization[edit]
Special Move customization was added in Super Smash Bros. 4 and returns in Super Smash Bros. Ultimate for the Mii Fighters. These are the variations:
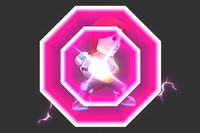
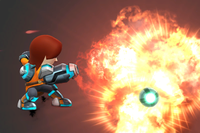
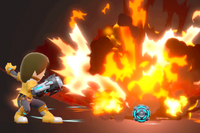
| 1. Echo Reflector | 2. Bomb Drop | 3. Absorbing Vortex |
|---|---|---|
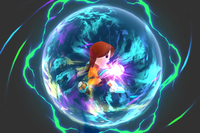 | ||
| "Reflects enemy projectiles, sending them back even stronger than they were before." | "A thrown bomb that rolls a short distance on the ground." | "Sucks in enemy projectiles, forming a barrier that also heals your damage." |
Ultimate[edit]
| 1. Echo Reflector | 2. Bomb Drop | 3. Absorbing Vortex |
|---|---|---|
| "Reflects enemy projectiles, sending them back even stronger than they were before." | "Rolls a bomb forward. It detonates after a short while or by triggering the move again." | "Creates a barrier that pulls in enemy projectiles and weak explosions to heal damage." |
Gallery[edit]
Absorbing Vortex as shown by the Move List in Ultimate.
Names in other languages[edit]
Trivia[edit]
- If the Shadow Assist Trophy freezes Mii Gunner while Absorbing Vortex is active, it remains fully functional while frozen, being able and absorb attacks and heal as normal.
- This interaction causes a visual quirk of the Absorbing Vortex effect acting at normal speed while frozen despite Mii Gunner not moving and the affect being slowed while in Shadow's slowdown.
