Pikachu (SSB4)/Up tilt: Difference between revisions
From SmashWiki, the Super Smash Bros. wiki
Jump to navigationJump to search
m (Text replacement - "== ([^=])" to "== $1") |
Omega Tyrant (talk | contribs) m (Removed technical data tag, what other technical data could be missing here?) |
||
| (2 intermediate revisions by one other user not shown) | |||
| Line 2: | Line 2: | ||
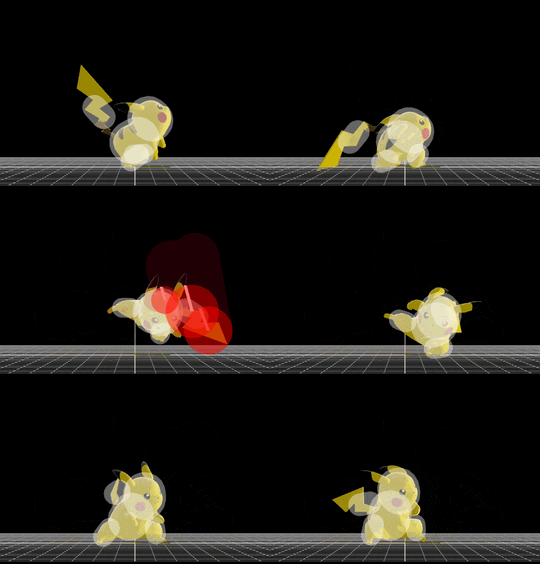
[[File:PikachuUpTilt.gif|thumb|270px|Hitbox visualization showing Pikachu's up tilt.]] | [[File:PikachuUpTilt.gif|thumb|270px|Hitbox visualization showing Pikachu's up tilt.]] | ||
{{competitive expertise}} | {{competitive expertise}} | ||
==Overview== | |||
Pikachu swipes its tail over its head in a quick arc. Since the hitbox starts from behind and travels in an arc, it is faster to hit an opponent behind Pikachu, but is a good [[combo]] starter from any position. This move can combo into itself multiple times in a row against opponents at very low damage percents, and once their vertical knockback is greater than this move's [[reach]], [[Pikachu (SSB4)/Up aerial|up aerial]] serves as an effective followup to continue the [[juggle]], or [[Pikachu (SSB4)/Back aerial|back aerial]] can be used as a followup to start a [[bridge]] combo instead. | |||
==Hitboxes== | ==Hitboxes== | ||
Latest revision as of 01:03, May 23, 2023
Overview[edit]
Pikachu swipes its tail over its head in a quick arc. Since the hitbox starts from behind and travels in an arc, it is faster to hit an opponent behind Pikachu, but is a good combo starter from any position. This move can combo into itself multiple times in a row against opponents at very low damage percents, and once their vertical knockback is greater than this move's reach, up aerial serves as an effective followup to continue the juggle, or back aerial can be used as a followup to start a bridge combo instead.
Hitboxes[edit]
Timing[edit]
| Hitboxes | 7-13 |
|---|---|
| Interruptible | 27 |
| Animation length | 41 |
Lag time |
Hitbox |
Interruptible |
|

