Super Smash Bros. Ultimate

Little Mac (SSBU)/Down aerial: Difference between revisions

From SmashWiki, the Super Smash Bros. wiki
Jump to navigationJump to search
No edit summary
 
(One intermediate revision by the same user not shown)
Line 1: Line 1:
{{ArticleIcons|ssbu=y}}
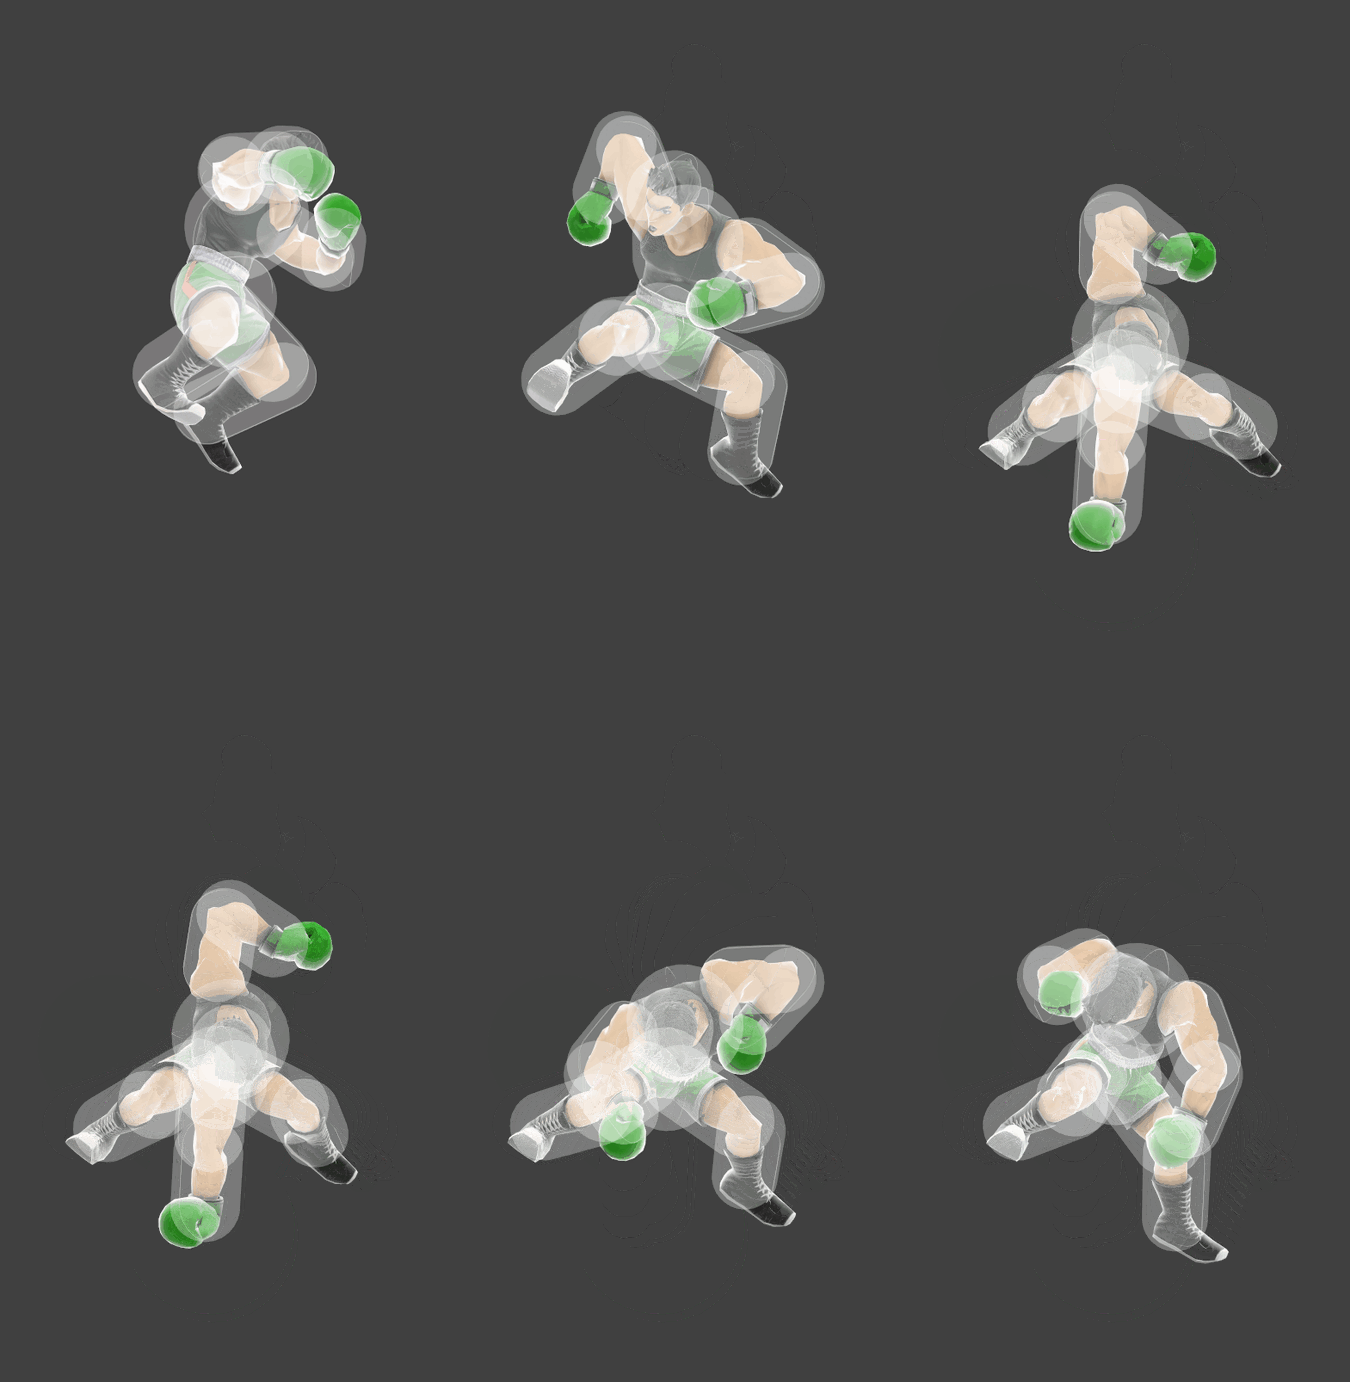
[[File:LittleMacDAirSSBU.gif|thumb|450px|Hitbox visualization showing Little Mac's down aerial.]]
[[File:LittleMacDAirSSBU.gif|thumb|450px|Hitbox visualization showing Little Mac's down aerial.]]
{{competitive expertise}}
==Overview==
==Overview==
Little Mac throws a weak palm thrust downwards. Like all of little macs aerials, it's inept in almost every typical offensive use for a down air. While it has a [[meteor smash]] hitbox, the hitbox is pitifully weak and acts as a sour-spot, with the meteor spike almost never landing KO's unless the opponent is footstooled immediately after or has a poor recovery. It can [[lock]] floor opponents in niche situations however.
Despite this, the move has a solid place in Mac's kit due to it being able to help little mac's recovery, if down air is interrupted with [[Rising Uppercut]], Little Mac gains slightly more horizontal distance, giving Mac a tiny boost to his horizontal recovery. This is reasonably easy to do, as the moves interruptible window is fairly long. However, this only applies if Little Mac is facing towards the ledge. While the distance Little Mac gains may seem negligible and pointless, Little Mac has a notoriously bad recovery, and even just a little distance can be the difference between recovering and failing to do so. Despite the move being niche and ineffective as an actual attack, this move is crucial to makes recovery, giving it a solid place in Mac's arsenal.
==Hitboxes==
==Hitboxes==
{{UltimateHitboxTableHeader}}

Latest revision as of 17:35, November 7, 2022

Hitbox visualization showing Little Mac's down aerial.

Overview[edit]

Little Mac throws a weak palm thrust downwards. Like all of little macs aerials, it's inept in almost every typical offensive use for a down air. While it has a meteor smash hitbox, the hitbox is pitifully weak and acts as a sour-spot, with the meteor spike almost never landing KO's unless the opponent is footstooled immediately after or has a poor recovery. It can lock floor opponents in niche situations however.

Despite this, the move has a solid place in Mac's kit due to it being able to help little mac's recovery, if down air is interrupted with Rising Uppercut, Little Mac gains slightly more horizontal distance, giving Mac a tiny boost to his horizontal recovery. This is reasonably easy to do, as the moves interruptible window is fairly long. However, this only applies if Little Mac is facing towards the ledge. While the distance Little Mac gains may seem negligible and pointless, Little Mac has a notoriously bad recovery, and even just a little distance can be the difference between recovering and failing to do so. Despite the move being niche and ineffective as an actual attack, this move is crucial to makes recovery, giving it a solid place in Mac's arsenal.

Hitboxes[edit]

ID Part Rehit rate Damage SD Angle Angle type BK KS FKV Set weight Radius Bone Offset SDI× T% Clang Rebound Effect Type G A Sound Direct Hit bits Hit part Blockable Reflectable Absorbable Flinchless No GFX Heedless
0 0 0 5.0% 0 Sakurai angle Standard 0 80 0 HitboxTableIcon(False).png 3.0 armr -1.0 0.0 0.0 1.0× 1.0× 0% HitboxTableIcon(Clang).png HitboxTableIcon(Rebound).png Normal (effect) Hand (type) HitboxTableIcon(GroundedTrue).png HitboxTableIcon(AerialTrue).png S Punch SpecialsDirect.png All All HitboxTableIcon(Blockable).png HitboxTableIcon(Unreflectable).png HitboxTableIcon(Unabsorbable).png HitboxTableIcon(False).png HitboxTableIcon(False).png HitboxTableIcon(False).png
1 0 0 4.0% 0 AngleIcon270spk.png Standard 0 80 0 HitboxTableIcon(False).png 3.5 armr 3.0 0.0 0.0 1.0× 1.0× 0% HitboxTableIcon(Clang).png HitboxTableIcon(Rebound).png Normal (effect) Hand (type) HitboxTableIcon(GroundedTrue).png HitboxTableIcon(AerialTrue).png S Punch SpecialsDirect.png All All HitboxTableIcon(Blockable).png HitboxTableIcon(Unreflectable).png HitboxTableIcon(Unabsorbable).png HitboxTableIcon(False).png HitboxTableIcon(False).png HitboxTableIcon(False).png
2 0 0 4.0% 0 Sakurai angle Standard 0 80 0 HitboxTableIcon(False).png 2.0 shoulderr 0.0 0.0 0.0 1.0× 1.0× 0% HitboxTableIcon(Clang).png HitboxTableIcon(Rebound).png Normal (effect) Hand (type) HitboxTableIcon(GroundedTrue).png HitboxTableIcon(AerialTrue).png S Punch SpecialsDirect.png All All HitboxTableIcon(Blockable).png HitboxTableIcon(Unreflectable).png HitboxTableIcon(Unabsorbable).png HitboxTableIcon(False).png HitboxTableIcon(False).png HitboxTableIcon(False).png

Timing[edit]

Attack[edit]

Hitboxes 7-10
Ending autocancel 25-
Interruptible 28
Animation length 49
FrameIcon(Lag).png FrameIcon(Lag).png FrameIcon(Lag).png FrameIcon(Lag).png FrameIcon(Lag).png FrameIcon(Lag).png FrameIcon(Hitbox).png FrameIcon(Hitbox).png FrameIcon(Hitbox).png FrameIcon(Hitbox).png FrameIcon(Lag).png FrameIcon(Lag).png FrameIcon(Lag).png FrameIcon(Lag).png FrameIcon(Lag).png FrameIcon(Lag).png FrameIcon(Lag).png FrameIcon(Lag).png FrameIcon(Lag).png FrameIcon(Lag).png FrameIcon(Lag).png FrameIcon(Lag).png FrameIcon(Lag).png FrameIcon(Lag).png FrameIcon(Lag).png FrameIcon(Lag).png FrameIcon(Lag).png FrameIcon(Interruptible).png FrameIcon(Interruptible).png FrameIcon(Interruptible).png FrameIcon(Interruptible).png FrameIcon(Interruptible).png FrameIcon(Interruptible).png FrameIcon(Interruptible).png FrameIcon(Interruptible).png FrameIcon(Interruptible).png FrameIcon(Interruptible).png FrameIcon(Interruptible).png FrameIcon(Interruptible).png FrameIcon(Interruptible).png FrameIcon(Interruptible).png FrameIcon(Interruptible).png FrameIcon(Interruptible).png FrameIcon(Interruptible).png FrameIcon(Interruptible).png FrameIcon(Interruptible).png FrameIcon(Interruptible).png FrameIcon(Interruptible).png FrameIcon(Interruptible).png
FrameIcon(Blank).png FrameIcon(Blank).png FrameIcon(Blank).png FrameIcon(Blank).png FrameIcon(Blank).png FrameIcon(Blank).png FrameIcon(Blank).png FrameIcon(Blank).png FrameIcon(Blank).png FrameIcon(Blank).png FrameIcon(Blank).png FrameIcon(Blank).png FrameIcon(Blank).png FrameIcon(Blank).png FrameIcon(Blank).png FrameIcon(Blank).png FrameIcon(Blank).png FrameIcon(Blank).png FrameIcon(Blank).png FrameIcon(Blank).png FrameIcon(Blank).png FrameIcon(Blank).png FrameIcon(Blank).png FrameIcon(Blank).png FrameIcon(Autocancel).png FrameIcon(Autocancel).png FrameIcon(Autocancel).png FrameIcon(Autocancel).png FrameIcon(Autocancel).png FrameIcon(Autocancel).png FrameIcon(Autocancel).png FrameIcon(Autocancel).png FrameIcon(Autocancel).png FrameIcon(Autocancel).png FrameIcon(Autocancel).png FrameIcon(Autocancel).png FrameIcon(Autocancel).png FrameIcon(Autocancel).png FrameIcon(Autocancel).png FrameIcon(Autocancel).png FrameIcon(Autocancel).png FrameIcon(Autocancel).png FrameIcon(Autocancel).png FrameIcon(Autocancel).png FrameIcon(Autocancel).png FrameIcon(Autocancel).png FrameIcon(Autocancel).png FrameIcon(Autocancel).png FrameIcon(Autocancel).png

Landing lag[edit]

Interruptible 19
Animation length 25
FrameIcon(Lag).png FrameIcon(Lag).png FrameIcon(Lag).png FrameIcon(Lag).png FrameIcon(Lag).png FrameIcon(Lag).png FrameIcon(Lag).png FrameIcon(Lag).png FrameIcon(Lag).png FrameIcon(Lag).png FrameIcon(Lag).png FrameIcon(Lag).png FrameIcon(Lag).png FrameIcon(Lag).png FrameIcon(Lag).png FrameIcon(Lag).png FrameIcon(Lag).png FrameIcon(Lag).png FrameIcon(Interruptible).png FrameIcon(Interruptible).png FrameIcon(Interruptible).png FrameIcon(Interruptible).png FrameIcon(Interruptible).png FrameIcon(Interruptible).png FrameIcon(Interruptible).png
Legend (1 square = 1 frame)
Lag
Lag time
Hitbox
Hitbox
Auto-canceling
Autocancel
Interruptibility
Interruptible