Toon Link (SSB4)/Neutral attack/Hit 1: Difference between revisions
From SmashWiki, the Super Smash Bros. wiki
Jump to navigationJump to search
(New Page: {{competitive expertise}} {{technical data}} {{SSB4HitboxTableHeader}} {{SSB4HitboxTableRow |id=0 |part=0 |damage=3% |angle=50 |bk=35 |ks=34 |fkv=0 |r=3.5 |bn=16 |xpos=0.0 |ypos=0.0 |z...) |
m (Text replacement - "== ([^=])" to "== $1") |
||
| (9 intermediate revisions by 5 users not shown) | |||
| Line 1: | Line 1: | ||
{{ArticleIcons|ssb4=y}} | |||
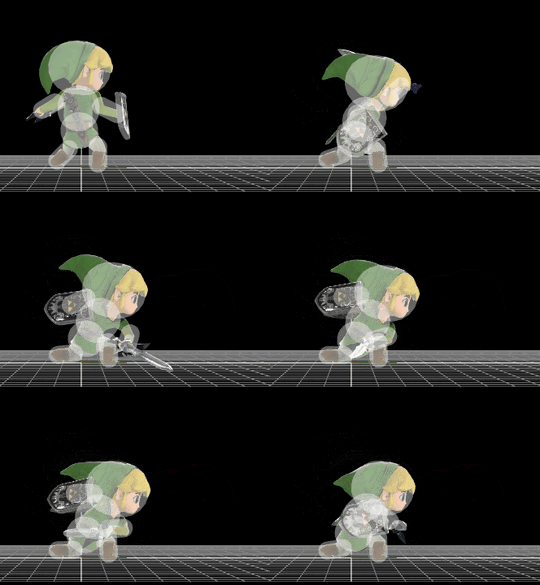
[[File:ToonLinkJab1.gif|thumb|270px|Hitbox visualization showing Toon Link's jab 1.]] | |||
{{competitive expertise}} | {{competitive expertise}} | ||
==Update history== | |||
{{GameIcon|ssb4}} [[1.0.8]] | |||
*{{buff|Neutral attack's first hit's hitboxes re-positioned. Combined with the other changes to the rest of the combo, neutral attack is far more reliable at connecting.}} | |||
==Hitboxes== | |||
{{SSB4HitboxTableHeader}} | {{SSB4HitboxTableHeader}} | ||
{{SSB4HitboxTableRow | {{SSB4HitboxTableRow | ||
| Line 67: | Line 73: | ||
|} | |} | ||
==Timing== | |||
{|class="wikitable" | |||
!Hitbox | |||
|6-7 | |||
|- | |||
!Earliest continuable frame | |||
|7 | |||
|- | |||
!Interruptible | |||
|20 | |||
|- | |||
!Animation length | |||
|33 | |||
|} | |||
{{FrameStripStart}} | |||
{{FrameStrip|t=Lag|c=5}}{{FrameStrip|t=Hitbox|c=2|e=HitboxContinuableS}}{{FrameStrip|t=Lag|c=12|s=LagContinuableE}}{{FrameStrip|t=Interruptible|c=14}} | |||
{{FrameStripEnd}} | |||
{{FrameIconLegend|lag=y|hitbox=y|continuable=y|interruptible=y}} | |||
{{MvSubNavToonLink|g=SSB4}} | {{MvSubNavToonLink|g=SSB4}} | ||
[[Category:Toon Link (SSB4)]] | |||
[[Category:Neutral attacks (SSB4)]] | |||
Latest revision as of 22:03, April 12, 2022
Update history[edit]
 Neutral attack's first hit's hitboxes re-positioned. Combined with the other changes to the rest of the combo, neutral attack is far more reliable at connecting.
Hitboxes[edit]
Timing[edit]
| Hitbox | 6-7 |
|---|---|
| Earliest continuable frame | 7 |
| Interruptible | 20 |
| Animation length | 33 |
Lag time |
Hitbox |
Continuable |
Interruptible |
|

