Mewtwo (SSB4)/Back aerial: Difference between revisions
From SmashWiki, the Super Smash Bros. wiki
Jump to navigationJump to search
| Line 7: | Line 7: | ||
==Hitboxes== | ==Hitboxes== | ||
{{SSB4HitboxTableHeader}} | |||
{{SSB4HitboxTableRow | |||
|id=0 | |||
|damage=13% | |||
|angle=361 | |||
|bk=20 | |||
|ks=90 | |||
|fkv=0 | |||
|r=5.5 | |||
|bn=0 | |||
|xpos=0.0 | |||
|ypos=12.0 | |||
|zpos=-7.7 | |||
|type=Tail | |||
|effect=Normal | |||
|slvl=L | |||
|sfx=Punch | |||
}} | |||
{{SSB4HitboxTableRow | |||
|id=1 | |||
|damage=11% | |||
|angle=361 | |||
|bk=20 | |||
|ks=90 | |||
|fkv=0 | |||
|r=4.5 | |||
|bn=1005 | |||
|xpos=1.0 | |||
|ypos=0.0 | |||
|zpos=-2.0 | |||
|type=Tail | |||
|effect=Normal | |||
|slvl=L | |||
|sfx=Punch | |||
}} | |||
{{SSB4HitboxTableRow | |||
|id=2 | |||
|damage=9% | |||
|angle=361 | |||
|bk=20 | |||
|ks=90 | |||
|fkv=0 | |||
|r=3.4 | |||
|bn=1007 | |||
|xpos=0.0 | |||
|ypos=0.0 | |||
|zpos=0.0 | |||
|type=Tail | |||
|effect=Normal | |||
|slvl=M | |||
|sfx=Punch | |||
}} | |||
|} | |||
==Timing== | ==Timing== | ||
Revision as of 23:55, June 9, 2021
Overview
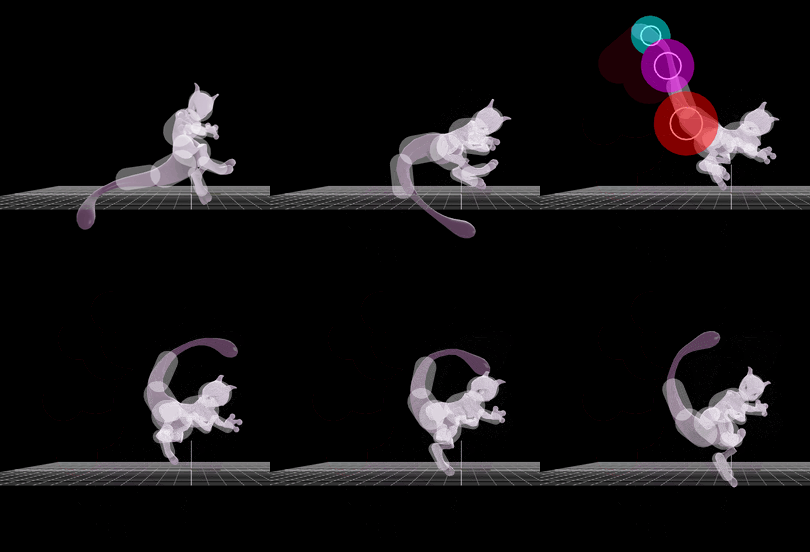
Mewtwo flips its gigantic tail in an upward direction behind itself. Like Mewtwo's other aerial attacks, this is an extremely versatile move, notably able to generate a Wall of pain against certain characters at certain percentages. Additionally, its tail has the ability to semi-Shark opponents standing on the ledge when used off-stage, giving the character a move that can be hard to predict against while attempting to recover.
Hitboxes
Timing
Attack
| Initial autocancel | 1-2 |
|---|---|
| Hitboxes | 13-17 |
| Ending autocancel | 38- |
| Interruptible | 40 |
| Animation length | 50 |
Landing lag
| Animation length | 17 |
|---|
Lag time |
Hitbox |
Autocancel |
Interruptible |
|


