File:Homebrew channel logo.png
The Homebrew Channel startup screen as displayed on the Wii Menu.

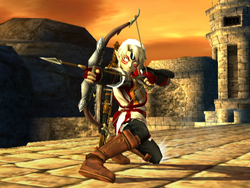
The Homebrew Channel allows custom textures to be loaded from an SD card. Here, Link appearance has been changed to look like his Fierce Deity form from The Legend of Zelda: Majora's Mask.
The Homebrew Channel is an unofficial Wii Channel that allows a user to load homebrew applications such as SD cards. Applications such as Gecko OS and Ocarina allow the user to use codes in video games, fundamentally similar to Action Replay. Brawl+, for example, uses certain codes to change various game elements such as physics.
Accessing Gecko OS through the Homebrew Channel is a common method for utilizing the many hacks available for Super Smash Bros. Brawl.
Installation
There are a few ways to install The Homebrew Channel (HBC) with the current Wii firmware; the listed methods all require an SD card (though only Letterbomb will work with an SDHC card):
Indiana Pwns - using an exploit in LEGO Indiana Jones
- If you have an existing LEGO Indiana Jones save, move it to another SD card.
- Copy the "private" directory from the Indiana Pwns download to the root of your SD card.
- Take your homebrew and put it in the ROOT of your SD card as "boot.elf".
- Put your SD card in your Wii and turn it on.
- Go into Wii Options -> Data Management -> Save Data -> Wii.
- Go to SD card and select the "Indiana Pwns" save that corresponds to your game region.
NOTE: Some people are having problems with the Wii not "seeing" the save file on the SD card. If you are experiencing this, try setting the archive bit for the data.bin file. In Windows this can be either be done from the file's properties dialog (right click on it in Windows Explorer and check the box) or from the command line using "attrib +a <path to data.bin>". - Copy the save to the Wii.
- Boot LEGO Indiana Jones.
- Load the saved game you just copied to the Wii.
- When the game loads, you will be in Barnett College. Walk to the Art Room (through the Courtyard), approach the left character on the podium. When it zooms on him, choose the "switch to" option (two silhouettes, staggered, with an arrow pointing between them).
Smash Stack - using an exploit in the Stage Builder in Brawl
- Go to the stage builder, move any existing custom stages on Brawl to your SD card, and exit the stage builder. Smash Stack will not work if the console has any custom stages on it, even the three samples that come with a new file or the stages from the Smash Service.
- Connect the SD card to your computer and rename the "private" folder to "privateold" in the root of the SD card.
- Copy the "private" folder from the Smash Stack download to the root of the SD card.
- Grab a *.elf file (HackMii Installer's boot.elf works) and put that in the root of the SD card.
- Insert the SD card into the Wii.
- Go back to the stage builder and the .elf file will load.
LetterBomb - using a exploit in the Wii Message Board
- On Computer: If there is a folder titled "private" on your SD card, rename it to "privateold"
- On Computer: Copy the "private" directory from the LetterBomb download to the root of your SD card.
- On Computer: Take your homebrew (preferably Hackmii Installer) and put it in the ROOT of your SD card as "boot.elf". Note that you can download the Hackmii Installer directly from the download link provided above. You will be asked for U (American), E (Europe), J (Japanese) or K (Korean).
- Wii: Put your SD card in your Wii and turn it on.
- Wii: Go into the Wii Message Board and navigate to "Today", "Yesterday" or "Two days ago".
- Wii: Click on the appropriate envelope.
