Kirby (SSB)/Forward aerial: Difference between revisions
No edit summary |
m (Text replacement - "== ([^=])" to "== $1") |
||
| (4 intermediate revisions by 3 users not shown) | |||
| Line 3: | Line 3: | ||
==Overview== | ==Overview== | ||
[[File:Kirby Forward Aerial Hitbox Smash 64.gif|thumb|Hitboxes of Kirby's fair.]] | [[File:Kirby Forward Aerial Hitbox Smash 64.gif|thumb|Hitboxes of Kirby's fair.]] | ||
Kirby uses his two feet to | Kirby uses his two feet to drill forward for 8 hits, doing 2% damage per kick and 6% damage on the 8th hit for a total of 20% damage. It's a viable [[edgeguarding]] move with decent knockback (though {{mvsub|Kirby|SSB|back aerial}} and {{mvsub|Kirby|SSB|down aerial}} are better), and can [[combo]] well, as well as being a quick and easy-to-use damage racker due to the large amount of hits. However, like other drills, the move can be [[DI]]'d out of. While it can be DI'd out however, a Kirby can trick his opponent by only using the first 2/3 hits, allowing easy combos to forward smash and up tilt (such as up tilt x2 weak forward air, up tilt, weak forward air, f-smash vs. Falcon at 0, a combo seen in multiple training mode combo videos). This is however difficult to do. Some of the moves that can go with this move include a {{mvsub|Kirby|SSB|forward smash}}, an {{mvsub|Kirby|SSB|up tilt}}, and a down aerial. | ||
{{ | ==Hitboxes== | ||
{{SSB64HitboxTableHeader}} | |||
{{HitboxTableTitle|Hits 1-7 (loop)|42}} | |||
{{SSB64HitboxTableRow | |||
|id=0 | |||
|part=0 | |||
|damage=2% | |||
|angle=-90 | |||
|bk=0 | |||
|ks=100 | |||
|fkv=30 | |||
|r=190 | |||
|bn=0 | |||
|xpos=0 | |||
|ypos=150 | |||
|zpos=220 | |||
|sfx=Kick | |||
|slvl=M | |||
}} | |||
{{SSB64HitboxTableRow | |||
|id=1 | |||
|part=0 | |||
|damage=2% | |||
|angle=-90 | |||
|bk=0 | |||
|ks=100 | |||
|fkv=30 | |||
|r=180 | |||
|bn=0 | |||
|xpos=0 | |||
|ypos=150 | |||
|zpos=100 | |||
|sfx=Kick | |||
|slvl=M | |||
}} | |||
{{HitboxTableTitle|Hit 8|42}} | |||
{{SSB64HitboxTableRow | |||
|id=0 | |||
|part=0 | |||
|damage=6% | |||
|angle=361 | |||
|bk=10 | |||
|ks=120 | |||
|fkv=0 | |||
|r=190 | |||
|bn=0 | |||
|xpos=0 | |||
|ypos=150 | |||
|zpos=220 | |||
|sfx=Kick | |||
|slvl=L | |||
}} | |||
{{SSB64HitboxTableRow | |||
|id=1 | |||
|part=0 | |||
|damage=6% | |||
|angle=361 | |||
|bk=10 | |||
|ks=120 | |||
|fkv=0 | |||
|r=180 | |||
|bn=0 | |||
|xpos=0 | |||
|ypos=150 | |||
|zpos=100 | |||
|sfx=Kick | |||
|slvl=L | |||
}} | |||
{{HitboxTableTitle|Landing hit|42}} | |||
{{SSB64HitboxTableRow | |||
|id=0 | |||
|part=0 | |||
|damage=3% | |||
|angle=361 | |||
|bk=0 | |||
|ks=100 | |||
|fkv=80 | |||
|r=150 | |||
|bn=0 | |||
|ypos=150 | |||
|zpos=220 | |||
|type=Foot | |||
|sfx=Kick | |||
|slvl=M | |||
}} | |||
{{SSB64HitboxTableRow | |||
|id=1 | |||
|part=0 | |||
|damage=3% | |||
|angle=361 | |||
|bk=0 | |||
|ks=100 | |||
|fkv=80 | |||
|r=135 | |||
|bn=0 | |||
|ypos=150 | |||
|zpos=100 | |||
|type=Foot | |||
|sfx=Kick | |||
|slvl=M | |||
}} | |||
|} | |||
==Timing== | |||
{|class="wikitable" | |||
!Initial autocancel | |||
|1-7 | |||
|- | |||
!Hits | |||
|8-9, 11-12, 14-15, 17-18, 20-21, 23-24, 26-27, 28 | |||
|- | |||
!Ending autocancel | |||
|29- | |||
|- | |||
!Animation length | |||
|39 | |||
|} | |||
{{FrameStripStart}} | |||
{{FrameStrip|t=Lag|c=7}}{{FrameStrip|t=Hitbox|c=2}}{{FrameStrip|t=Lag|c=1}}{{FrameStrip|t=Hitbox|c=2}}{{FrameStrip|t=Lag|c=1}}{{FrameStrip|t=Hitbox|c=2}}{{FrameStrip|t=Lag|c=1}}{{FrameStrip|t=Hitbox|c=2}}{{FrameStrip|t=Lag|c=1}}{{FrameStrip|t=Hitbox|c=2}}{{FrameStrip|t=Lag|c=1}}{{FrameStrip|t=Hitbox|c=2}}{{FrameStrip|t=Lag|c=1}}{{FrameStrip|t=Hitbox|c=2|e=HitboxChangeS}}{{FrameStrip|t=Hitbox|c=1|s=HitboxChangeE}}{{FrameStrip|t=Lag|c=11}} | |||
|- | |||
{{FrameStrip|t=Autocancel|c=7}}{{FrameStrip|t=Blank|c=21}}{{FrameStrip|t=Autocancel|c=11}} | |||
{{FrameStripEnd}} | |||
===Landing lag=== | |||
{|class="wikitable" | |||
|- | |||
!Hitbox | |||
|1-3 | |||
|- | |||
!Animation length | |||
|30 | |||
|- | |||
!L-cancelled animation length | |||
|4 | |||
|} | |||
{{FrameStripStart}} | |||
|Normal {{FrameStrip|t=Hitbox|c=3}}{{FrameStrip|t=Lag|c=27}} | |||
|- | |||
|L-cancelled {{FrameStrip|t=Lag|c=4}}{{FrameStrip|t=Blank|c=26}} | |||
{{FrameStripEnd}} | |||
{{FrameIconLegend|lag=y|hitbox=y|autocancel=y}} | |||
{{MvSubNavKirby|g=SSB}} | {{MvSubNavKirby|g=SSB}} | ||
| Line 12: | Line 154: | ||
[[Category:Forward aerials (SSB)]] | [[Category:Forward aerials (SSB)]] | ||
[[Category:Normal attacks (SSB)]] | [[Category:Normal attacks (SSB)]] | ||
[[Category:Aerial attacks (SSB)]] | [[Category:Aerial attacks (SSB)]] | ||
Latest revision as of 21:28, April 12, 2022
Overview[edit]
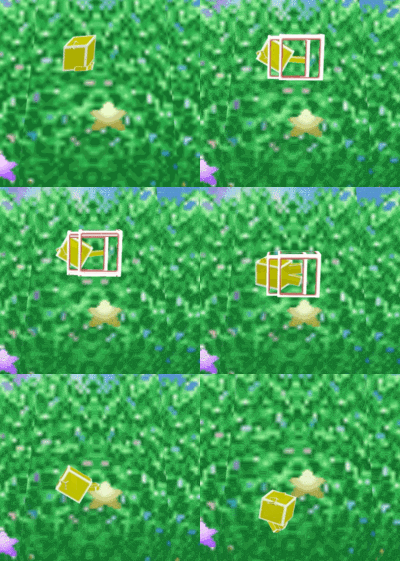
Kirby uses his two feet to drill forward for 8 hits, doing 2% damage per kick and 6% damage on the 8th hit for a total of 20% damage. It's a viable edgeguarding move with decent knockback (though back aerial and down aerial are better), and can combo well, as well as being a quick and easy-to-use damage racker due to the large amount of hits. However, like other drills, the move can be DI'd out of. While it can be DI'd out however, a Kirby can trick his opponent by only using the first 2/3 hits, allowing easy combos to forward smash and up tilt (such as up tilt x2 weak forward air, up tilt, weak forward air, f-smash vs. Falcon at 0, a combo seen in multiple training mode combo videos). This is however difficult to do. Some of the moves that can go with this move include a forward smash, an up tilt, and a down aerial.
Hitboxes[edit]
Timing[edit]
| Initial autocancel | 1-7 |
|---|---|
| Hits | 8-9, 11-12, 14-15, 17-18, 20-21, 23-24, 26-27, 28 |
| Ending autocancel | 29- |
| Animation length | 39 |
Landing lag[edit]
| Hitbox | 1-3 |
|---|---|
| Animation length | 30 |
| L-cancelled animation length | 4 |
| Normal | ||||||||||||||||||||||||||||||
| L-cancelled |
Lag time |
Hitbox |
Autocancel |
