Bowser (SSB4)
| Bowser in Super Smash Bros. 4 | |
|---|---|
 
| |
| Universe | Mario |
| Other playable appearances | in Melee in Brawl |
| Availability | Starter |
| Final Smash | Giga Bowser |
| Tier | E (30) |
Bowser (クッパ, Koopa) is a playable character in Super Smash Bros. 4. His return to the series was confirmed on June 11th, 2013 during E3 2013, during which he was one of the main subjects of the Developer Direct for SSB4,[1] as well as the last veteran confirmed during the event.[2] Bowser reuses his voice clips from Super Smash Bros. Brawl, some of which have been edited to sound deeper, as well as new voice clips.
Bowser is ranked 30th out of 56 on the tier list, placing him in the E tier and making him both the second lowest ranked mid-tier character and the second highest ranked super heavyweight. This is a considerable improvement from his standing in Brawl, where he was ranked 33rd out of 38, and is also his highest tier placement in the series to date. Many of Bowser's problems have been fixed, as he is much more mobile, has much greater reach and both his combo and grab games have seen noticeable improvements. Alongside his new benefits, he retains his immense endurance, overall high damage output, and very strong KOing options.
However, Bowser remains virtually defenseless outside of out of shield Whirling Fortress, as he is very susceptible to combos due to his large size, heavy weight, and lack of combo breakers. This is exacerbated by his lack of good landing options and how his rolls and sidesteps are short both in distance and intangibility duration. Lastly, his recovery, while improved from Melee and Brawl, is still below average.
Attributes
Defying his overall presences in Melee and Brawl, Bowser combines power with speed; while he retains a slow walking speed, slow falling speed, high gravity, average air speed, slow air acceleration, average traction and the slowest jumpsquat, his dashing speed and double jump height have both been significantly increased. This grants him mobility that is slow overall, yet balanced compared to most heavyweights. As the heaviest character in the game, Bowser has the greatest amount of horizontal endurance, as well as the third greatest amount of vertical endurance, being surpassed only by his fellow super heavyweights King Dedede and Donkey Kong.
Bowser's greatest strength is the immense power of his attacks. Since most of his attacks are highly damaging, Bowser has an easy time racking up damage, especially when compared to combo-oriented characters, such as Mario and Sheik. In addition, most of his moves have high knockback as well, granting him numerous (if not the most) KO options. Some of his moves are among the strongest of the cast, including the second strongest meteor smash in his down aerial, one of the strongest semi-spikes in his back aerial and the second strongest forward smash, which is marginally weaker (but faster overall) than King Dedede's. The introduction of rage further amplifies the power of his moves, without reducing the efficiency of his combos. His great survivability can also allow him to take full advantage of it, as it is very difficult to KO Bowser without a strong attack. Furthermore, Bowser has great physical range in many of his attacks, allowing him to space opponents more easily than many other characters. Combined with the aforementioned perks, Bowser is proficient at edgeguarding.
Bowser also has a formidable grab game. While not particularly fast, his grabs are among the farthest reaching in the game, with his pivot grab being notoriously effective, making it easy for him to grab opponents that are not right next to him. His pummel and his forward, back and down throws deal respectable damage. His up throw's low damage output is counterbalanced by its low knockback, which grants Bowser many reliable follow-ups until around 75%, depending mostly on the opponent's falling speed. His down throw is the optimal choice for either forcing opponents off-stage for an edgeguard or preventing his other throws from becoming stale. His back throw is among the strongest, being surpassed only by Ness', Toon Link's and Villager's, and can KO at 195% from center-stage. His forward throw is the strongest in the game, reliably KOing anyone at 180% from center-stage.
Finally, Bowser has a versatile special moveset. Fire Breath is Bowser's only projectile, which can be used to fend off opponents or gimp recoveries due to it ability to be angled, while the nerf to SDI makes it quite difficult to escape when caught up close. Flying Slam is a command grab, allowing it to ignore shields and counterattacks. Upon a successful grab, Bowser is invincible up until he jumps to perform a flipping belly-to-belly suplex that deals enough knockback to KO around 120% or even earlier if he lands on a platform. After getting grabbed, the opponent cannot do anything other than slightly alter the move's trajectory. Whirling Fortress is Bowser's primary means of recovery, granting below average vertical distance but good horizontal distance, with the former increasing if button mashing is utilized. It is also a phenomenal out of shield option, as well as Bowser's fastest attack. Lastly, Bowser Bomb is very powerful and can be used as an alternative to fast-falling, making it useful for grabbing the ledge while at the same time threatening edgeguarders. It also deals additional shield damage, meaning that a shield break will occur if both of its hits connect.
However, Bowser has some glaring flaws. One of his biggest problems is air-to-ground transitioning. All of his aerials have at least 20 frames of landing lag, with his back and down aerials having 40 each. As none of his aerials have favorable autocancel windows, returning to the ground is very difficult for him, or even impossible without air dodging and/or fast-falling, due to his slow aerial mobility. As a result, Bowser is quite vulnerable to combos and heavily susceptible to juggling, making it easy for opponents to rack up damage on him, further worsened by his large size. His down aerial is his only move that can help mitigate these issues, but its aforementioned landing lag and stall-then-fall status can make it quite unreliable most of the time. His moveset, while fast compared to most heavyweights, is slow when compared to the rest of the cast, limiting his combo starters to only up throw and jab canceled neutral attack, and making it difficult for him to keep up with faster opponents, such as Sonic. This also compounds another noticeable problem: his ability to escape pressure. Due to his slow rolls and sidestep, with the former also being short-distanced, Bowser's only real method of dealing with pressure is Whirling Fortress, which can be punished if executed too late. Some of his moves are also inevitable KOs if used off-stage, namely his two stall-then-falls, down aerial and Bowser Bomb, as well as Flying Slam. Lastly, despite his recovery being rather long-distanced, it is among the slowest of the cast, making aggressive edgeguarding more than enough to KO Bowser.
Bowser benefits greatly from custom moves. Compared to Fire Breath, Fire Shot is slower and has noticeable intervals between each flare, but has more range and does consistent damage, improving its edgeguarding capabilities and allowing it to be used effectively in the neutral game. Dash Slam is drastically weaker, but has a lower launch angle and moves Bowser forward, making it easier for him to grab opponents. Dash Slash deals less damage, but deals high knockback, hits throughout most of its animation and maintains the default version's autocanceling, granting Bowser a very reliable move for approaching and setting up combos. Both Flying Slam alternatives can also improve his recovery. Flying Fortress cannot be used out of shield, but grants twice as much vertical distance at high speed, significantly improving Bowser's vertical recovery.
Overall, Bowser is a surprisingly speedy powerhouse who relies on a defensive playstyle that requires timing his attacks carefully or focusing on punishing his opponents' mistakes in order to avoid serious punishment himself.
Changes from Brawl
Bowser has been significantly buffed in the transition to SSB4. Most of his moveset and animations have been completely revamped for the better; he is much more mobile overall (such as being able to outrun Marth, Toon Link, Donkey Kong, Pit and Mr. Game & Watch, all of whom were faster than him in Brawl), his endurance and recovery have been greatly improved, he possesses even faster and better attacks with farther reaches than he did in Brawl while being even more powerful than he was in Melee, and his throw-based combo game is much better than ever before as of update 1.1.3. All of these improvements now allow him to punish opponents more harshly and more safely than he could in previous games while remedying many of his flaws. Bowser retains Giga Bowser as his Final Smash, while retaining the animations and moves from Brawl.
The general physics and mechanics changes brought about by SSB4 also significantly aid Bowser. The universal nerfing of campable projectiles considerably helps Bowser's approach, while the removal of immediately re-grabbing an opponent after throwing them eliminates the zero-to-death or otherwise heavily damaging chain throws that plagued him in Melee and Brawl. Lastly, the introduction of the rage mechanic results in Bowser's immense endurance and power becoming even more useful than ever before.
These drastic improvements saw Bowser secure many high spots in promotional tournaments held for SSB4, and he is now considered a much better character compared to how he was in Melee and Brawl. However, Bowser's position among the cast is a point of debate due to numerous veterans having also been buffed to varying degrees. Despite no longer being plagued by poor mobility and reach, Bowser's flaw of being vulnerable to attack remains due to his large hurtbox (which increased even further in size in the transition to SSB4) and unsafe landing options. While his perception in the metagame has fluctuated over time, Bowser is a relatively viable character as of update 1.1.3, as he has become surprisingly effective for a super heavyweight like how he was perceived in the very early SSB4 metagame, if not to the same extent. While Bowser's high-level tournament representation has been rather poor, nerfs to top tiers like Sheik have allowed him to achieve better results recently, with dedicated players such as LordMix.
Aesthetics
 Due to the aesthetic used in SSB4, Bowser has a more cartoonish and sleeker design instead of the more realistic design he had in Brawl and his overall color scheme is more vibrant, making him better resemble his appearances in the latest Mario games. His pupils are also smaller.
- Like Yoshi, Bowser's posture is more erect and he has a more "battle ready" stance. This is translated into his moveset, be it through a tweaked animation or a completely new attack.
- Bowser's more erect stance has also resulted in his dashing, rolling, midair jumping, air dodging, crouching and crawling animations being changed. He now dashes upright instead of scuttling, remains upright instead of retreating into his shell when rolling, jumping or air dodging, and keeps his hands clenched instead of clawing the ground. Additionally, his crouch now looks similar to his crouching defense stance from Mario & Luigi: Bowser's Inside Story.
- Bowser is given new voice clips.
Attributes
- Like other large characters, such as Donkey Kong and King Dedede, Bowser's general size in proportion to the other playable characters is also greater than in previous installments. This improves his reach, but makes his hurtbox larger, making him easier to hit.
 Bowser now has a unique trait called Tough Guy. It is universal light armor against attacks that deal negligible knockback, such as the first hit of many neutral attacks. It is significantly amplified if Bowser has low damage and/or is crouching, but not while crawling or attacking.
- Bowser is heavier (120 → 130), improving his survivability and enabling him to use the rage mechanic effectively. However, this makes him more susceptible to combos.
- Bowser walks faster (0.8 → 0.858). Additionally, his walking speed while carrying heavy items now surpasses Donkey Kong's, although he remains unable to match DK's ability to jump or fall with them.
- Bowser dashes faster (1.527 → 1.792).
 Bowser's air speed is slower (1.034 → 1.0).
- Bowser's item throw is stronger (1.31432 → 1.33432).
- Double jump is significantly higher.
Ground attacks
- Bowser has a new neutral attack, an alternating pair of punches. Its second hit deals 1% more damage (5% → 6%) compared to the previous neutral attack.
- Bowser has a new forward tilt, a backhanded punch. It deals 1% more damage (11% → 12%) compared to the previous forward tilt.
- Up tilt deals 3% less damage (12% → 9%) and has increased start-up (frame 8 → 11).
- Up tilt has significantly increased reach overall, as it now reaches in front of Bowser. It also has significantly decreased ending lag.
- Down tilt's second hit has improved reach, now reaching slightly farther than the first hit.
- Down tilt's animation has slightly changed. It is now an alternating pair of swiping punches instead of claw swipes. This animation change also now fully matches its hitboxes, whereas in Brawl, the hitboxes did not cover Bowser's entire hands.
- Bowser has a new dash attack, a side kick. It deals more damage (11% → 12% (clean), 8% → 10% (late)), more knockback growth (30 → 35), it has significantly improved range and has significantly less ending lag compared to the previous dash attack.
- Dash attack has less base knockback (120 → 110) and more start-up (frame 10 → 11) compared to the previous dash attacl.
- Bowser has a new forward smash, a dropkick. Compared to the previous forward smash, it has more knockback growth (81 → 98), making it one of the three strongest forward smashes in the game and thus making it better at KOing. It also has less start-up (frame 27 → 22), significantly more reach and better hitbox placements, making it more accurate.
- Forward smash has weak hitboxes throughout its later portions that deal 6% less damage than its initial hitboxes (23%/20% → 17%/14%) and less knockback (10 (base)/103 (growth)) compared to the previous forward smash. It also has more ending lag.
- Forward smash consists of one hit instead of two hits, similarly to Bowser's forward smash in Melee. Compared to the previous forward smash, its overall damage potential is lower by 14% (46% → 32%). Unlike the previous forward smash, opponents cannot avoid its main KOing hitbox by escaping the weaker initial hit while it still has stronger power.
- Sourspotted up smash deals 3% more damage (12% → 15%) and increased knockback, improving its KO potential.
- Up smash has decreased start-up (frame 17 → 16), its sweetspot can now hit grounded opponents, and it can now clang with aerial attacks, improving its safety.
- Up smash's animation has slightly changed. Bowser now spins when performing it.
- Down smash deals 5% less damage (21% → 16%) and has decreased knockback growth (140 → 130), hindering its KO potential.
- Down smash is significantly harder to SDI out of. It also received an additional hitbox right before Bowser starts spinning, decreasing its overall start-up (frame 15 → 10).
- Down smash's angle has been altered (65° → 48°).
- Down smash's animation has slightly changed. Bowser now remains in place when performing it, similarly to how he performed it Melee.
Aerial attacks
- Bowser has a new neutral aerial, a cartwheel. Compared to the previous neutral aerial, its overall damage potential is higher by 11% (13% → 24%), it has less ending and landing lag, it consists of multiple hits, and its hitbox is larger and lasts longer.
- Forward aerial's sweetspot takes up a much larger portion of Bowser's arm and it has less ending and landing lag, giving it edgeguarding potential. Its hitboxes also reach farther above and below Bowser, improving its range. Additionally, it can now be autocanceled from a short hop.
- Forward aerial has increased start-up (frame 8 → 11).
- Forward aerial's animation has slightly changed. Bowser now slashes diagonally instead of straight down.
- Bowser has a new back aerial, a dropkick. Compared to the previous back aerial, it deals more damage (15%/7% → 19%) and it has different knockback (25 (base)/83 (growth) → 20/88), allowing it to KO below 100% from center-stage. It also has less ending lag and can autocancel from a short hop.
- Back aerial has a smaller hitbox, giving it slightly less range compared to the previous back aerial, although its range is still very long. It also has a shorter duration (frames 9-12). Unlike the previous back aerial, it lacks a sourspot to keep opponents at bay.
- Up aerial deals 2% less damage (17% → 15%) and has decreased knockback growth (93 → 85), hindering its KO potential.
- Up aerial has decreased start-up (frame 16 → 9).
- Down aerial deals 13% less damage (29% → 16%) and has slightly increased start-up.
- Down aerial is now a stall-then-fall instead of being a drill. It has increased base knockback (10 → 30), it meteor smashes during its first few frames, deals diagonal upward knockback during its later frames, and produces a shockwave upon landing. This grants it KO, edgeguarding and anti-juggling potential and also improves its safety. Because it is now a stall-then-fall, it can also be used to down aerial stall.
- Down aerial can no longer be canceled until it ends and does not edge sweetspot, making it very unsafe to use off-stage.
Throws/other attacks
- Grab's animation has been changed. Bowser now grabs and holds opponents with one arm, similarly to the Koopa Klaw's grab from Melee. Bowser also no longer falls over when he whiffs a dash grab.
- All grabs have increased reach, now being among the farthest reaching non-tether grabs in the game.
- Standing and dash grabs have decreased start-up and ending lag.
- Pivot grab has increased start-up and ending lag.
- Forward throw deals 2% more damage (10% → 12%) and has increased knockback growth (50 → 66), improving its KO potential.
- Forward throw's animation has slightly changed. Bowser now places the opponent on his head and tosses his head horizontally.
- Bowser has a new back throw, where he uses one arm in a sideways motion to throw opponents behind himself, similarly to Donkey Kong's back throw. Compared to the previous back throw, it deals 2% more damage (10% → 12%) and has more knockback growth (50 → 66), making it better at KOing.
- Up throw deals 4% less damage (10% → 6%).
- Up throw no longer has set knockback (25 (base)/180 (growth)), but it has decreased ending lag (frame 68 → 61) and its angle has been altered (70° → 82°), giving it combo potential.
- Down throw has significantly increased knockback (75 (base)/30 (growth) → 90/80), improving its KO potential.
- Bowser has a new edge attack, where he crawls up onto the stage and slashes forward similarly to his above 100% edge attack in previous games.
Special moves
- Fire Breath has decreased start-up and ending lag, increased range and larger hitboxes.
- Fire Breath's farthest hitboxes no longer flinch.
- Fire Breath slightly pushes Bowser back while slightly pushing the opponent away. This hinders its damage output, as opponents will not stay trapped for as long as before. However, this improves its safety, as opponents will no longer be able to SDI through the flames to punish Bowser for using the move.
- Flying Slam has increased knockback growth (50 → 60), significantly improving its KO potential. Bowser is now invincible before he leaves the ground, while a whiffed grab also autocancels upon landing for its entire duration, improving its safety. Additionally, Bowser has more control over the trajectory of Flying Slam.
- Flying Slam grab has decreased vertical reach, making it more difficult to grab opponents from the air. This also removes Koopa Hopping, hindering its utility.
- A Bowsercide now KOs Bowser first, meaning he will lose instead of winning or causing Sudden Death if he performs it when he and his opponent are on their last stocks, although this may not always be the case. This also releases the opponent and thus allows them to potentially recover back to the stage.
- Grounded Whirling Fortress now hits multiple times instead of once, improving its out of shield potential.
- Airborne Whirling Fortress now covers significantly more vertical distance by button mashing the special button, it gains height at a faster speed, and can now grab ledges from behind, significantly improving its recovery potential.
- A shadow is added to the inside of Bowser's shell, obscuring his face except for his eyes.
- Bowser Bomb deals more shield damage (0 → 5). When combined with the changes to shield mechanics, this makes it capable of breaking full shields if all of its hitboxes connect. It also descends faster and Bowser performs it much faster when initiated from the ground.
- Giga Bowser's duration is shorter.
Update history
Bowser has received numerous buffs from game updates. However, he received one major nerf in update 1.0.4, as Flying Slam no longer KOs the opponent first if a Bowsercide is performed. On the flipside, Flying Slam has been significantly compensated for, as Bowser now has more control of its trajectory, it transitions faster, has a larger grab range, and now has invincibility frames before he leaves the ground. His up tilt, neutral aerial and Fire Shot have also been improved to varying degrees, while he significantly benefits from the changes on shield mechanics in 1.1.0 and 1.1.1; the changes grant his attacks even more chances of breaking a character's shield and give him an open attacking opportunity, but weakens his out of shield punishes with his Whirling Fortress. Update 1.1.3 heavily buffed his grab game; while up throw's damage output was decreased, it is now a reliable combo starter into many of Bowser's powerful moves, though this was toned down somewhat in update 1.1.4. While Bowser's buffs do not address his more critical weaknesses, they have arguably helped to counterbalance them.
- Self-destructs using Flying Slam now KO Bowser first instead of the opponent. When Bowser is KO'd, the opponent is released from the grab, potentially allowing them to recover back onto the stage.
- Certain properties of Fire Breath have been adjusted.
- Bowser has more control over Flying Slam's trajectory.
- Up tilt deals 1% less damage: 10% → 9%.
- Up tilt's start-up and ending lag decreased: 12 frames (start-up)/51 frames (ending) → 11/41.
- Down smash's angle altered: 60° → 48°.
- Neutral aerial deals 1% more damage: 5% → 6% and its landing lag decreased
- Fire Shot has been improved. It deals 1% more damage: 5% (clean)/4% (late) → 6%/5%, its base knockback increased: 25 → 35, its hit radius increased: 4u (clean)/3.5u (late) → 5u (both), its late hit's duration increased: 15 frames → 20 and its ending lag now matches Fire Breath's.
- Up throw has less ending lag (FAF 69 → 64).
- Up throw deals less damage (1% (hits 1-7)/10% (total) → 0.5%/6.5%).
- Up throw's first seven hits have a lower hitlag multiplier (1x → 0.5x). This makes the throw faster to execute although it still remains extremely easy to react to/DI.
- Up throw's final hit deals more knockback (0 (base), 100 (scaling) → 80/200), making it more potent against bystanders.
- Up throw launches opponents at a higher angle (70° → 82°) and it has more base knockback but less knockback scaling (90 (base), 80 (scaling) → 25/155). When combined with its lower ending lag, these changes not only improve up throw's KO potential but they also transform up throw into a highly potent combo throw, granting it combo potential right up until higher percents, including KO confirms into up and back aerial.
- Flying Slam's grab to slam transition is considerably faster (38 frames → 25), now only being a few frames slower than its Brawl counterpart.
- However, the slam to grab transition has less intangibility (frames 1-23 → 1-16), as the intangibility frames were not adjusted for the move's new frame speed multiplier.
- Bowser has more control over Flying Slam's trajectory (base air acceleration: 0.18 → 0.21).
- The opponent has more control over Flying Slam's trajectory (base air acceleration: 0.17 → 0.19).
- However, this does not fully compensate for Bowser's greater air acceleration, giving him more control overall.
- All variations of Flying Slam now have invincibility frames before Bowser leaves the ground.
- All variations of Whirling Fortress can now grab ledges from behind drastically sooner (frame 48 (Whirling Fortress) → 8), now matching grabbing ledges from the front.
- Dash attack deals more damage (10% (clean)/8% (late) → 12%/10%). Its knockback values were not compensated, giving the move more knockback.
- Up throw has higher knockback scaling (155 → 180), hindering its combo potential at high percentages.
- However, this also improves its combo potential at lower percents, in addition to allowing Bowser’s up throw, up air combo to KO at lower percents.
- All variations of Flying Slam have increased grab range.
Technical changelist 1.1.4
| Change | Old value | New value |
|---|---|---|
| Ground Hand Hitbox Size | 4/3 | 5/4 |
| Large Hitbox X Position | 17 | 17.5 |
| Ground to Air Hand Hitbox | 1/1 | 2/2 |
| Outer Hitbox X Position | 17 | 17.5 |
| Air Hand Hitbox | 5/3.5 | 6/4.5 |
| Large Hitbox X Position | 15 | 15.5 |
- Air speed (0.98 → 1).
- Weight (128 → 130).
- Max Walk speed with heavy items (1.31432 → 1.33432).
Moveset
- Bowser has a unique trait called Tough Guy, which is universal light against attacks that deal negligible knockback. However, it lasts until 50%-100% and is mostly limited to weak neutral attacks (particularly neutral infinites) and very few projectiles (such as Luigi's Fireball, Ness' PK Fire, Bayonetta's uncharged Bullet Climax and Mega Man's forward tilt). Tough Guy is significantly amplified while Bowser has low damage and/or is crouching, but not while crawling or attacking.
- Bowser can crawl, although it has no practical use due to his large crouching hurtbox.
| Name | Damage | Description | ||
|---|---|---|---|---|
| Neutral attack | 5% | Two alternating punches. Bowser's arms are intangible as long as their hitboxes are active. The first hit has set knockback and can be jab canceled into other moves, such as a dash grab, while the second hit has noticeable KO potential around 155% near the edge. | ||
| 6.5% | ||||
| Forward tilt | 12% | A backhanded punch. Fairly powerful with fast start-up and good reach, it also renders Bowser's arm intangible as long as its hitbox is active, allowing it to effectively disrupt most oncoming attacks. It is based on the second hit of his Drill Claw attack in Super Mario RPG: Legend of the Seven Stars. | ||
| Up tilt | 9% | An overhead arcing slash. Has respectable utility, as it can be a good combo move at low percentages either by starting and then chaining into itself, acting as a follow-up from up throw, or acting as a KOing option around 150%. | ||
| Down tilt | 14% (hit 1), 11% (hit 2) | Two sweeping, alternating punches. It has a chance to trip at low percentages, but the first hit does not connect into the second hit past medium percentages. The second hit has slightly farther reach, while both hits boast respectable knockback, making it a decent KOing option near the edge. | ||
| Dash attack | 12% (clean), 10% (late) | A side kick, similar to Meta Knight's dash attack. Good for hitting prone or tumbling opponents. | ||
| Forward smash | 23% (clean feet), 20% (clean body), 17% (late feet), 14% (late body) | A dropkick. It is the third strongest forward smash in the game, being surpassed only by King Dedede's and max aura Lucario's, as well as being somewhat fast despite its power. Its outstanding knockback also threatens shields, as they will take severe damage from it, so much so that they can almost break from a fully charged forward smash. When spaced properly, it can even hit opponents hanging on an edge or lingering just below it. | ||
| Up smash | 20% (hit 1 center), 15% (hit 1 sides), 6% (hit 2) | Gets down on all fours and hops to thrust his shell's spikes upward. Bowser's shell is fully invincible, nullifying any move that happens to collide with it, making this move all but impossible to challenge from above. However, it will still clank against a move that has invincibility frames. It also hits on both sides following the hop, but these hits deal considerably less knockback. | ||
| Down smash | 2% (hit 1), 1% (hits 2-6), 9% (hit 7) | Spins around in his shell, hitting multiple times with his spikes. A fairly reliable KOing option under 150%. | ||
| Neutral aerial | 6% (hits 1-4) | A cartwheel. Can combo into forward and up aerials at low to medium percents. It is a mechanically unusual attack, as both its third and fourth hits are present at once (on Bowser's top and bottom half respectively). As such, connecting with the fourth hit before the third hit will mean the third hit will not connect with the opponent. Despite this quirk, it is the third most damaging aerial attack in the game, dealing 24% if all of its hits connect, being surpassed only by max aura Lucario's back aerial and Yoshi's down aerial. | ||
| Forward aerial | 13% (hand), 12% (arm), 11% (body) | Slashes forward in a diagonal arc. It has great range, as it can even hit opponents below him, while its quick start-up and respectable knockback allows it to KO reliably at 100% off-stage. It also autocancels from a short hop, which makes it widely agreed upon as being Bowser's most useful aerial. | ||
| Back aerial | 19% | A dropkick. It is very powerful, it can either KO around 100% from center-stage and as low as 60% at the edge, though it does not have much vertical range. The second strongest and most damaging back aerial in the game behind max aura Lucario's back aerial. | ||
| Up aerial | 15% | An upward headbutt. Although it is not as strong as in Brawl, it is still a viable KOing option due to KOing around 100% while near the upper blast line. | ||
| Down aerial | 16% (attack), 2% (landing) | Retracts into his shell, turns upside down, and propels himself downward. A stall-then-fall, it emits a small shockwave on both sides when he lands. It meteor smashes during the first few frames and deals respectable diagonal knockback during its later frames. Due to its large hitbox, its meteor smashing hitbox can effectively edgeguard when near the edge. Like other stall-then-falls, it will almost certainly cause a self-destruct if used off-stage. | ||
| Grab | — | Reaches out. Bowser has a fairly large grab range for a non-disjointed or non-tether grab, especially when pivot grabbing. | ||
| Pummel | 3.1% | A headbutt. Moderately slow,but deals respectable damage. | ||
| Forward throw | 12% | Places the opponent in between his horns, rears his head back and then whips his head forward to launch the opponent. Bowser's strongest throw and the strongest forward throw in the game, KOing around 135% near the edge. | ||
| Back throw | 12% | Throws the opponent backward in a sideways motion. It is very strong, KOing around 140% near the edge. | ||
| Up throw | 0.5% (hits 1-8), 2% (throw) | Throws the opponent slightly upward, withdraws into his shell and then spins rapidly in order to repeatedly stab them with his shell's spikes. Bowser's least damaging throw, but sports outstanding combo potential, as it can combo into either up tilt, up smash, neutral aerial, up aerial, forward aerial or back aerial, with the aerial follow-ups being especially effective against fast-fallers. | ||
| Down throw | 10% (hit 1), 2% (throw) | Places the opponent on the ground and splashes them. Its high base knockback, low knockback growth and high ending lag prevents it from having any follow-ups, although it deals respectable damage, KOs around 150% near the edge and can be used an alternative to his forward and back throws for setting up an edgeguard. | ||
| Forward roll Back roll Spot dodge Air dodge |
— | — | ||
| Techs | — | — | ||
| Floor attack (front) Floor getups (front) |
7% | Stumbles up to his feet and claws at opponents behind and in front of him. | ||
| Floor attack (back) Floor getups (back) |
7% | Gets up and swipes while spinning. | ||
| Floor attack (trip) Floor getups (trip) |
5% | Attacks surrounding opponents with a wide slash. | ||
| Edge attack Edge getups |
7% | Climbs onto the stage and slashes. One of the farthest reaching edge attacks in the game, making it surprisingly useful. | ||
| Neutral special | Default | Fire Breath | 1.2% (loop hits) | Breathes a stream of fire that gradually loses strength and range. The move slowly regains its strength when not in use, and the flames at the very end of the stream cannot cause opponents to flinch. It can be angled up or down, which can potentially gimp recovering opponents. |
| Custom 1 | Fire Shot | 6% (clean), 5% (late) | Fires a large fireball that pierces enemies. Unlike Fire Breath, it will not weaken over time when used in succession. | |
| Custom 2 | Fire Roar | 2.7% (clean), 1.8% (late) | Deals more damage and has longer range, but loses range quickly and takes longer to recharge. | |
| Side special | Default | Flying Slam | 18% (throw), 15% (bystanders) | Grabs an opponent, jumps with them into the air and backflips repeatedly before belly-to-belly suplexing them against the ground. It deals immense vertical knockback that can KO at 120%, making it a very reliable KOing option. Its power and launching angle makes it difficult to properly DI, especially if the user has high gravity. The suplex can also hit other opponents on the ground that it lands into for similarly powerful knockback. It can be used to dive off-stage with the opponent for a potential sacrificial KO. |
| Custom 1 | Dash Slam | 12% (throw), 10% (bystanders) | Dashes forward before performing the belly-to-belly suplex with less vertical distance, but deals less damage. Its angle is more horizontal than vertical. | |
| Custom 2 | Dash Slash | 8% (clean), 6% (late) | A dashing slash, instead of a grab transitioned into a flipping belly-to-belly suplex. It deals high knockback, but noticeably less damage. Despite this, it is considered one of the most useful special custom moves in the game, due to its complete autocancel property and pseudo-wavedash, which makes it a safe approaching option and grants it combo potential. It is comparable to Koopa Klaw, though without the grab. | |
| Up special | Default | Whirling Fortress | 1% (ground loop), 4% (ground last), 10% (air hit 1), 3% (air hits 2-6), 2% (air hits 7-11) | Enters his shell and spins rapidly, being able to move forward and backwards while doing so. It acts as a recovery when performed in the air, propelling Bowser forward and upwards, but Bowser remains grounded when he performs it on the ground. Very versatile and a useful out of shield option. In the air, button mashing enables it to cover more vertical distance. Surprisingly long-ranged, but it can be intercepted easily. |
| Custom 1 | Flying Fortress | 4% | It covers more vertical distance, but at the cost of horizontal distance. It deals less damage due to only hitting once, but its single hit launches opponents. | |
| Custom 2 | Sliding Fortress | 6% | It covers more horizontal distance, but at the cost of vertical distance. It only hits once, deals less knockback and has increased ending lag. | |
| Down special | Default | Bowser Bomb | 4% (hop), 20% (drop), 11% (landing) | A Ground Pound. It deals immense vertical knockback to anyone hit and can KO under 100%, making it one of Bowser's most reliable KOing options. If performed in the air, Bowser performs the Ground Pound after a brief pause instead of leaping first. Emits a shockwave upon landing and will break full shields if all of its grounded hitboxes connect. However, it will almost certainly cause a self-destruct if used off-stage due to its ending lag. |
| Custom 1 | Turbulent Bomb | 4% (hop), 9% (drop), 9% (landing) | The Ground Pound emits a gale instead of a shockwave at its impact, pushing away any opponents next to where Bowser lands instead of damaging them. It deals damage overall and less knockback. Bowser also leaps lower, but it covers more horizontal distance, making it useful for gimping opponents with poor recoveries, such as Little Mac and Captain Falcon. | |
| Custom 2 | Slip Bomb | 18% (drop), 13% (landing), 2% (shockwave) | The Ground Pound trips any opponents standing near Bowser at its impact, although its high ending lag means it can still be punished by those who trip near Bowser. Bowser also leaps higher, covering more vertical distance, but at the cost of horizontal distance and hits leaping hitbox. | |
| Final Smash | Giga Bowser | — | Transforms into Giga Bowser, the final boss of Melee's Adventure Mode. Giga Bowser has total flinch resistance during his transformation. Giga Bowser regains all of Bowser's moves and animations from Melee and Brawl instead of using the moves gained in SSB4, possibly to fit more with his bestial motif. His smash attacks still inflict elemental damage. | |
On-screen appearance
- Emerges from a wall of flames.

|
|---|
Taunts
- Up taunt: Rears his head back, sways it in a circle, and roars while exhaling steam from his mouth. The voice clip is also used during down smash, much like in Melee and Brawl.
- Side taunt: Leans forward and chomps his jaws furiously five times, with drool coming out of his mouth.
- Down taunt: Balances precariously on one leg, as if teetering.
| Up taunt | Side taunt | Down taunt |
|---|---|---|

|

|

|
Idle poses
- Leans back and exhales steam from his mouth.
- Clenches his fists and performs posterior should stretches while exhaling steam from his nostrils.
 |

|
|---|
Crowd cheer
| English | Japanese | |
|---|---|---|
| Cheer | ||
| Description | Bow-ser! | Koopa! *claps 3 times* |
| Pitch | Group chant | Male |
Victory poses
- Takes two steps forward while swiping with his claws twice.
- Leans forward and then rears back triumphantly before roaring.
- Spins around in his shell and comes out grinning.
 |
 |

|
|---|
In competitive play
Official Custom Moveset Project
| Character | Custom sets available | ||||
|---|---|---|---|---|---|
| 1211 | 1311 | 3211 | 3311 | 1212 | |
| 1213 | 1312 | 1313 | 2211 | 2311 | |
Notable players
 0mart
0mart Ash23
Ash23- Chaos
- DireOnFire
 Greward
 HIKARU
- KENT
 KingKong
- Le Troof
- LordMix
- NickRiddle
 Pollo
Pollo- Shu
 WiiASE
- Zork
Trophies
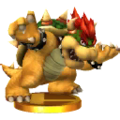
- Bowser

 The archenemy of Mario and the reason Peach spends more time kidnapped than in her own castle. His plans aren't always the best, and occasionally he even finds himself on Mario's side. In Smash Bros., he's a serious heavyweight who laughs off weaker attacks. Hit him hard to send him flying!
-
 Mario's archnemesis and the reason Peach spends more time in "another castle" than in her own. His plans almost never work out, and occasionally he even finds himself on Mario's side. In Smash Bros., he's a serious heavyweight who laughs off weaker attacks. You've gotta hit him hard to send him flying!
 Mario's princess-kidnapping arch-enemy. Yes, he's quite the villain, but he can also be a bit of a buffoon, too. And sometimes, he even ends up on Mario's side! As a serious heavyweight, he's tough to launch, and using standard attacks on him will only make him laugh. If you want to send him flying, make sure to whack him really hard!
 : Super Mario Bros. (10/1985)
 : Super Mario 64 (09/1996)
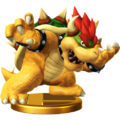
- Bowser (Alt.)
- Bowser makes good use of his heavy physique with his down special Bowser Bomb, slamming down with his bottom. If he's on the ground, he'll jump into the air before crashing down. Also, he can gain a bit of altitude if you press the special button repeatedly while executing Whirling Fortress, his up special.
- Bowser makes good use of his heavy physique with his down special Bowser Bomb, slamming down with his backside. If he's on the ground, he'll jump into the air before crashing down. Also, he can gain a bit of altitude if you press the special button repeatedly while executing his up special Whirling Fortress.
- Down special Bowser Bomb makes good use of Bowser's bulky physique to crush opponents. If you use it on the ground, he'll jump first, hitting anyone on the way up with his horns, then hit for a combo on the way down. When you use his Whirling Fortress up special in the air, press the button repeatedly to climb higher.
- : Super Mario Bros. (10/1985)
- : Super Mario 64 (09/1996)
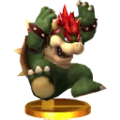
- Giga Bowser
- Prepare to behold Bowser in all his Koopa glory. This fearsome form first appeared all the way back in Melee. While transformed, Bowser deals extra damage, is better at launching foes, and even gains special effects on some of his attacks. He won't flinch and can't be thrown, but he does still take damage.
- The definitive way to prove that Bowser's the king. This fearsome form made its debut all the way back in Melee. While transformed, Bowser deals more damage, launches foes further, and certain attacks have extra effects like freezing opponents. He won't flinch, and he can't be thrown either, but he will still take damage.
Classic (3DS)
Alt. (3DS)
Classic (Wii U)
Alt. (Wii U)


In Event Matches
Solo Events
- A Battle of Scale: As a tiny Olimar, the player must defeat a giant Bowser.
- All-Star Battle: Melee: Bowser is one of the opponents fought in this event. All opponents debuted in Melee.
- Beautification: As Rosalina & Luma, the player must flower two Bowsers and two Ganondorfs.
- Enough with the Kidnapping: As Peach, the player must defeat Bowser and Bowser Jr.
- Family Ties: As Bowser Jr., the player is aided by a giant Bowser and must defeat Mario and Luigi.
- The Final Battle: The player must defeat Bowser, Ganondorf and King Dedede.
- The Original Heavyweights: As Mario, the player must defeat Bowser and Donkey Kong.
Co-op Events
- A Lurking Menace: As Mario and Luigi, two players must defeat Bowser Jr., but if the match lasts too long, they must also defeat a giant Bowser.
- A Royal Errand: As Robin and Marth, two players must collect 500G from Bowser and Wario in a Coin Battle.
- Final Battle Team-Up: Bowser appears as an opponent to be defeated.
- Peach in Peril: As Bowser Jr. and Bowser, two players must defeat all opponents except Peach, where KOing her results in a failure.
- Solidarity: As Olimar and Rosalina & Luma, two players must defeat Mario and Luigi and then must defeat Bowser and Bowser Jr.
- The Ultimate Battle: Two players select a character and must defeat the entire roster.
Alternate costumes

| |||||||

|

|

|

|

|

|

|

|
Gallery
Bowser in the Nintendo Direct from April 8th, 2014.
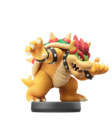
Bowser's amiibo.

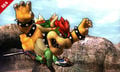
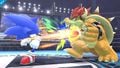
Bowser's appearance during E3.
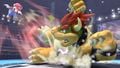
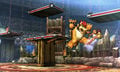
Using his new forward smash against Mario.
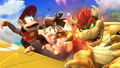
Using Flying Slam against Link in Super Smash Bros. for Nintendo 3DS.
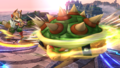
Using Whirling Fortress against Fox.
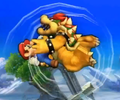
Using Flying Slam against Mario in Super Smash Bros. for Nintendo 3DS.
Bowser and Samus on Arena Ferox.
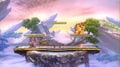
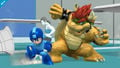
Bowser and Mario on Battlefield.
Bowser being kicked by the last hit of Sonic's neutral attack.
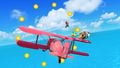
Bowser, Mario, Pikachu and Pit fighting on Pilotwings.
Bowser, Mega Man and Wii Fit Trainer on Wii Fit.
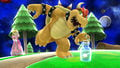
Using down taunt alongside Peach and a Bottled Fairy.
Bowser being damaged by Diddy Kong's overcharged Peanut Popgun.


Trivia
- Although Bowser was the last veteran confirmed during the E3 2013 event, he was the first veteran to debut in Melee to be confirmed.
- Bowser is the only veteran to have his victory theme change between Brawl and SSB4.
- Bowser's alt. trophy in Super Smash Bros. for Wii U resembles his All-Star Mode trophy in Melee.
References
| Fighters in Super Smash Bros. 4 | |
|---|---|
| Veterans | Bowser · Captain Falcon · Charizard · Diddy Kong · Donkey Kong · Dr. Mario · Falco · Fox · Ganondorf · Ike · Jigglypuff · King Dedede · Kirby · Link · Lucario · Lucas · Luigi · Mario · Marth · Meta Knight · Mewtwo · Mr. Game & Watch · Ness · Olimar · Peach · Pikachu · Pit · R.O.B. · Roy · Samus · Sheik · Sonic · Toon Link · Wario · Yoshi · Zelda · Zero Suit Samus |
| Newcomers | Bayonetta · Bowser Jr. · Cloud · Corrin · Dark Pit · Duck Hunt · Greninja · Little Mac · Lucina · Mega Man · Mii Fighter (Mii Brawler · Mii Gunner · Mii Swordfighter) · Pac-Man · Palutena · Robin · Rosalina & Luma · Ryu · Shulk · Villager · Wii Fit Trainer |